• Home
  • Page Layouts
  • Page Templates
  • Theme Colors
    • Lifestyle Pro Blue
    • Lifestyle Pro Green
    • Lifestyle Pro Mustard
    • Lifestyle Pro Purple
    • Lifestyle Pro Red
    • Lifestyle Pro Teal

Relish The Bite

Taste of happiness

  • HOME
  • ABOUT
  • RECIPE INDEX
    • SNACKS & APPETIZERS
    • BREAKFAST
    • BAKED RECIPES
    • LUNCH & DINNER
      • RICE/BIRYANI VARIETIES
      • SIDES
        • DRY CURRY/STIR-FRY
        • SOUTH INDIAN CURRY/KUZHAMBU
        • NORTH INDIAN CURRY/DAL
        • RAITA/DIPS/CHUTNEY
        • Soups/Salads
      • PASTA PIZZA & TACOS
      • BREAD
      • CHINESE ASIAN INSPIRED
    • NON-VEG RECIPES
    • DESSERTS
    • BEVERAGES
  • SNACKS
  • BREAKFAST
  • NON-VEG RECIPES
  • RICE/BIRYANI VARIETIES
  • LAMB
  • SOUTH INDIAN CURRY/KUZHAMBU
  • VEGAN
  • NORTH INDIAN CURRY/DAL
  • DRY CURRY/STIR-FRY
  • PASTA & TACOS
  • CHINESE ASIAN INSPIRED
  • BAKED RECIPES
  • COLLECTIONS
  • BREAD
  • BEVERAGES
  • DESSERTS
  • FESTIVAL RECIPES
    • SNACKS & APPETIZERS
    • SWEETS/DESSERTS
  • RESOURCES
    • HOW TO START A BLOG
    • TITBITS
    • PRESS
  • CONTACT
You are here: Home / 2014 / Archives for September 2014

Archives for September 2014

Roasted Eggplant Mozzarella Pasta

September 30, 2014 by Suki 8 Comments

RoastedEggplantMozarella

RoastedEggplantMozarella

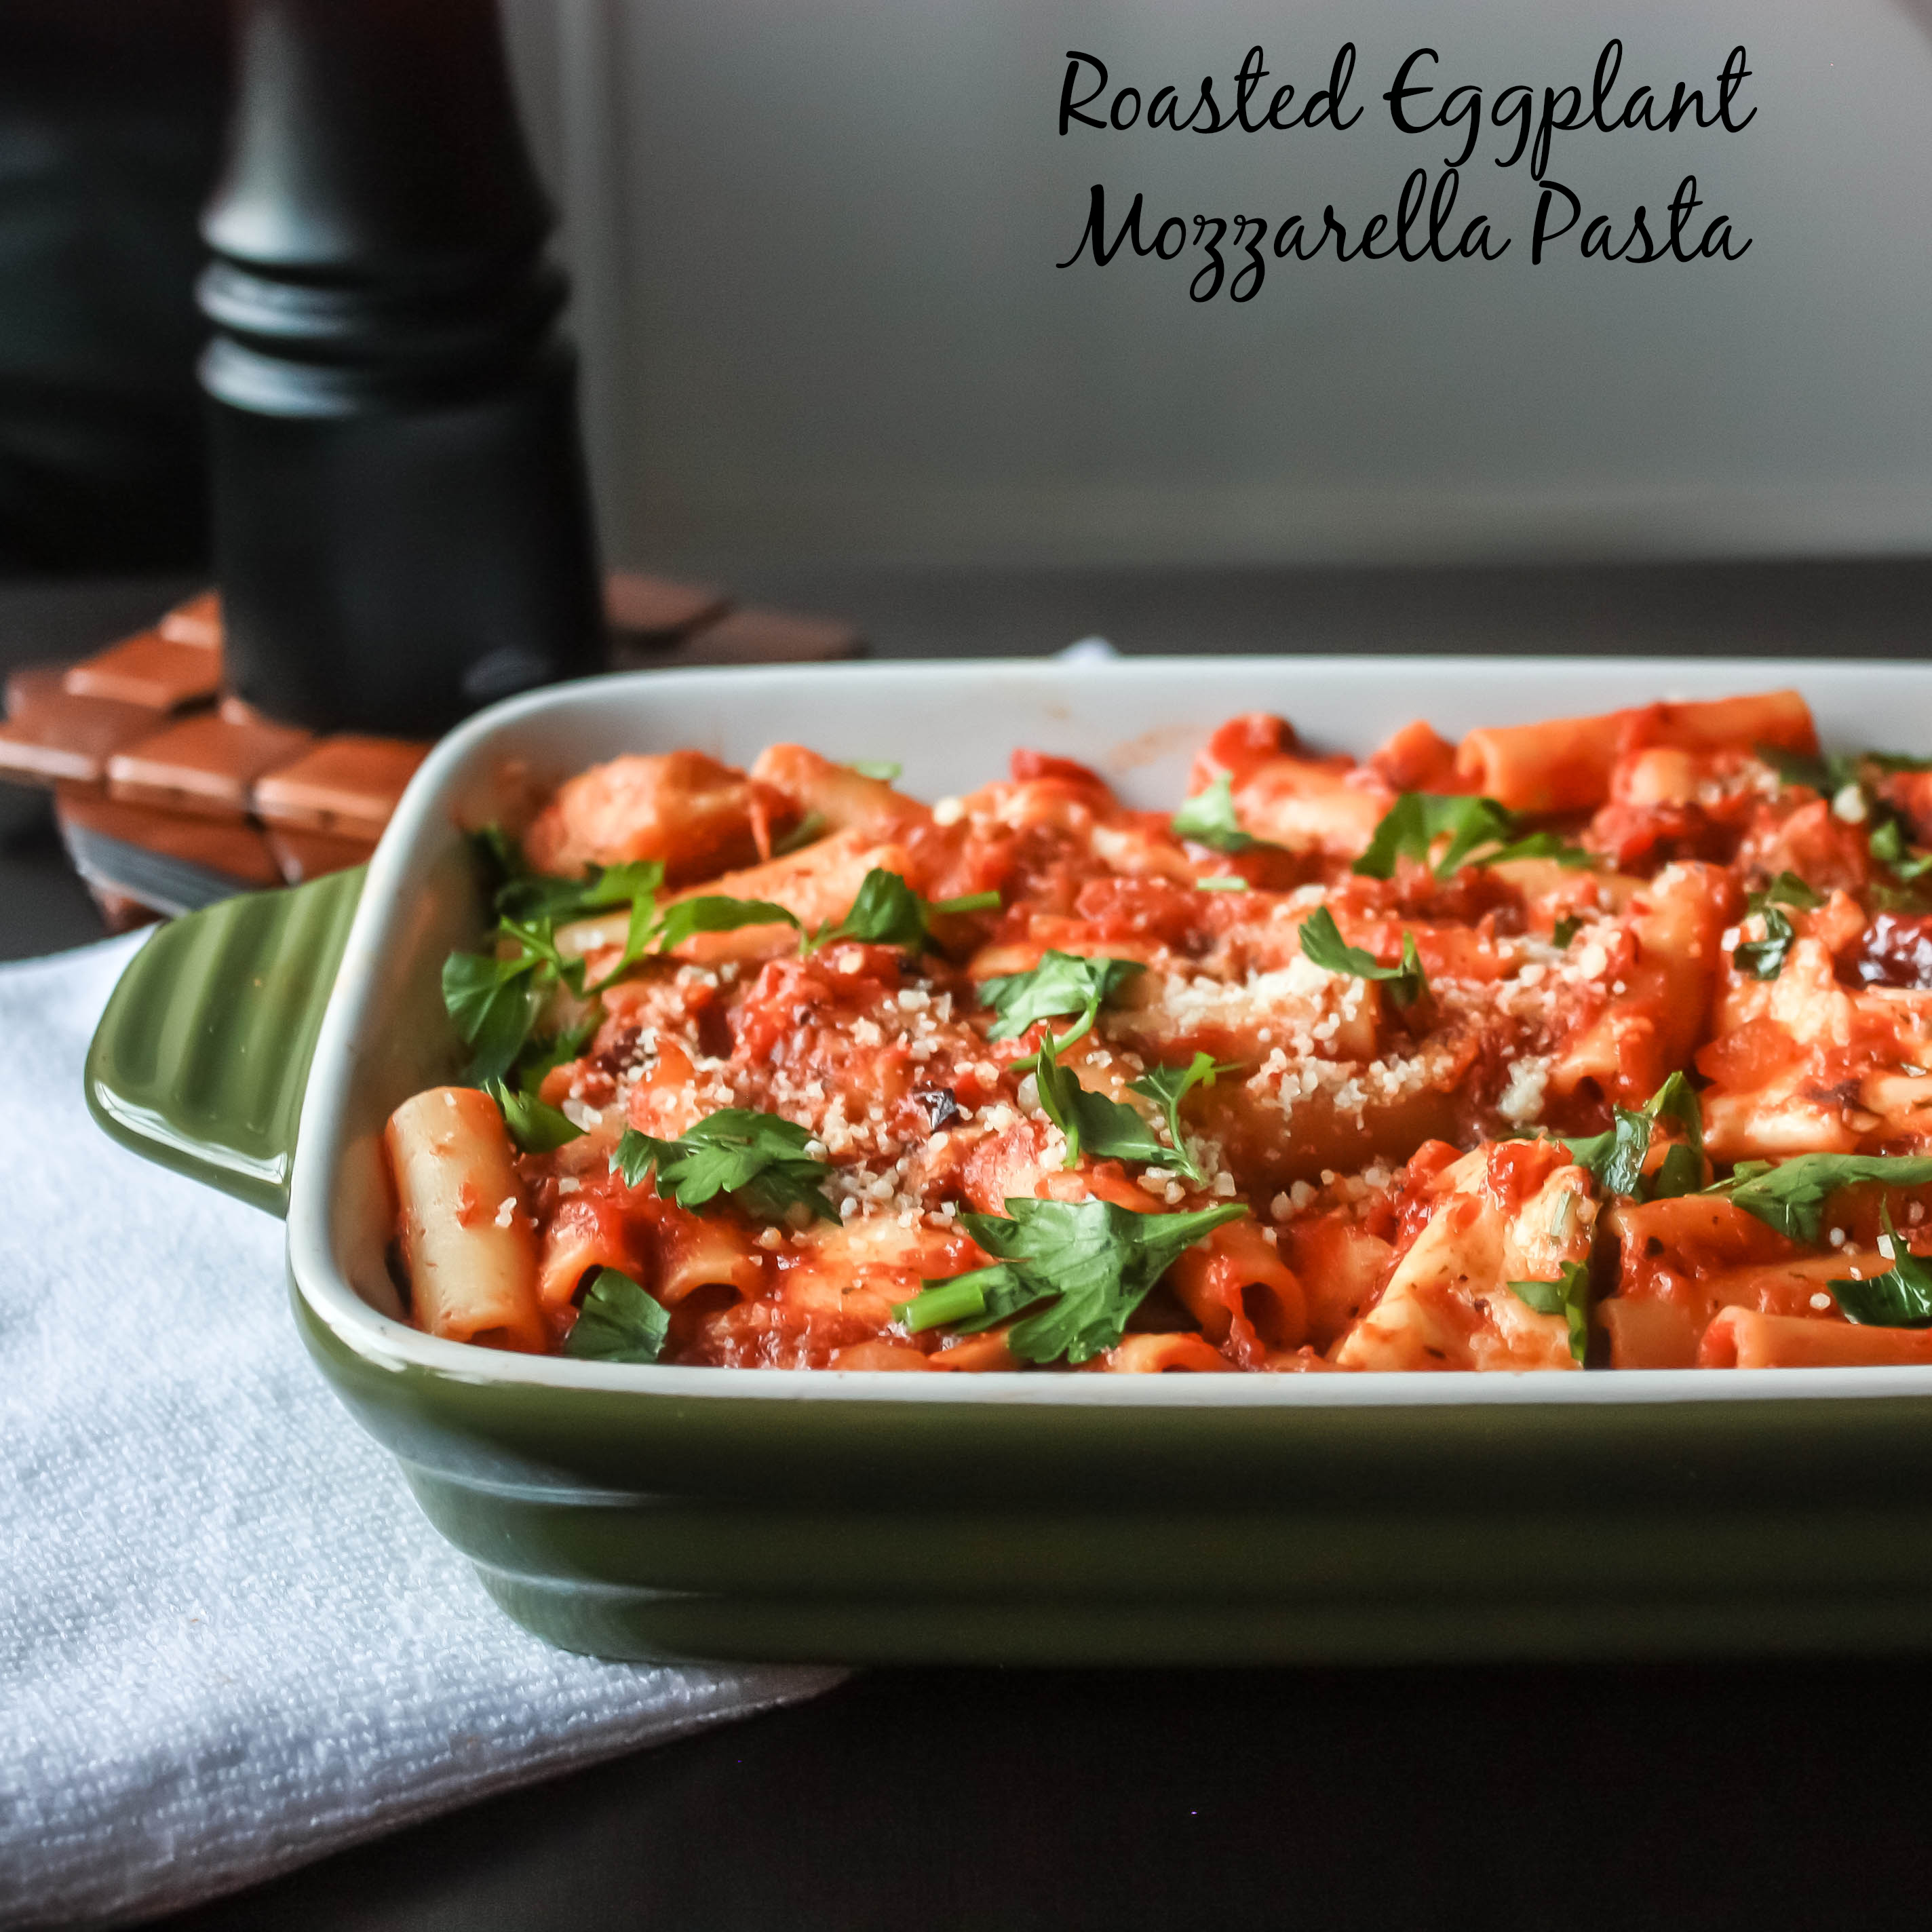
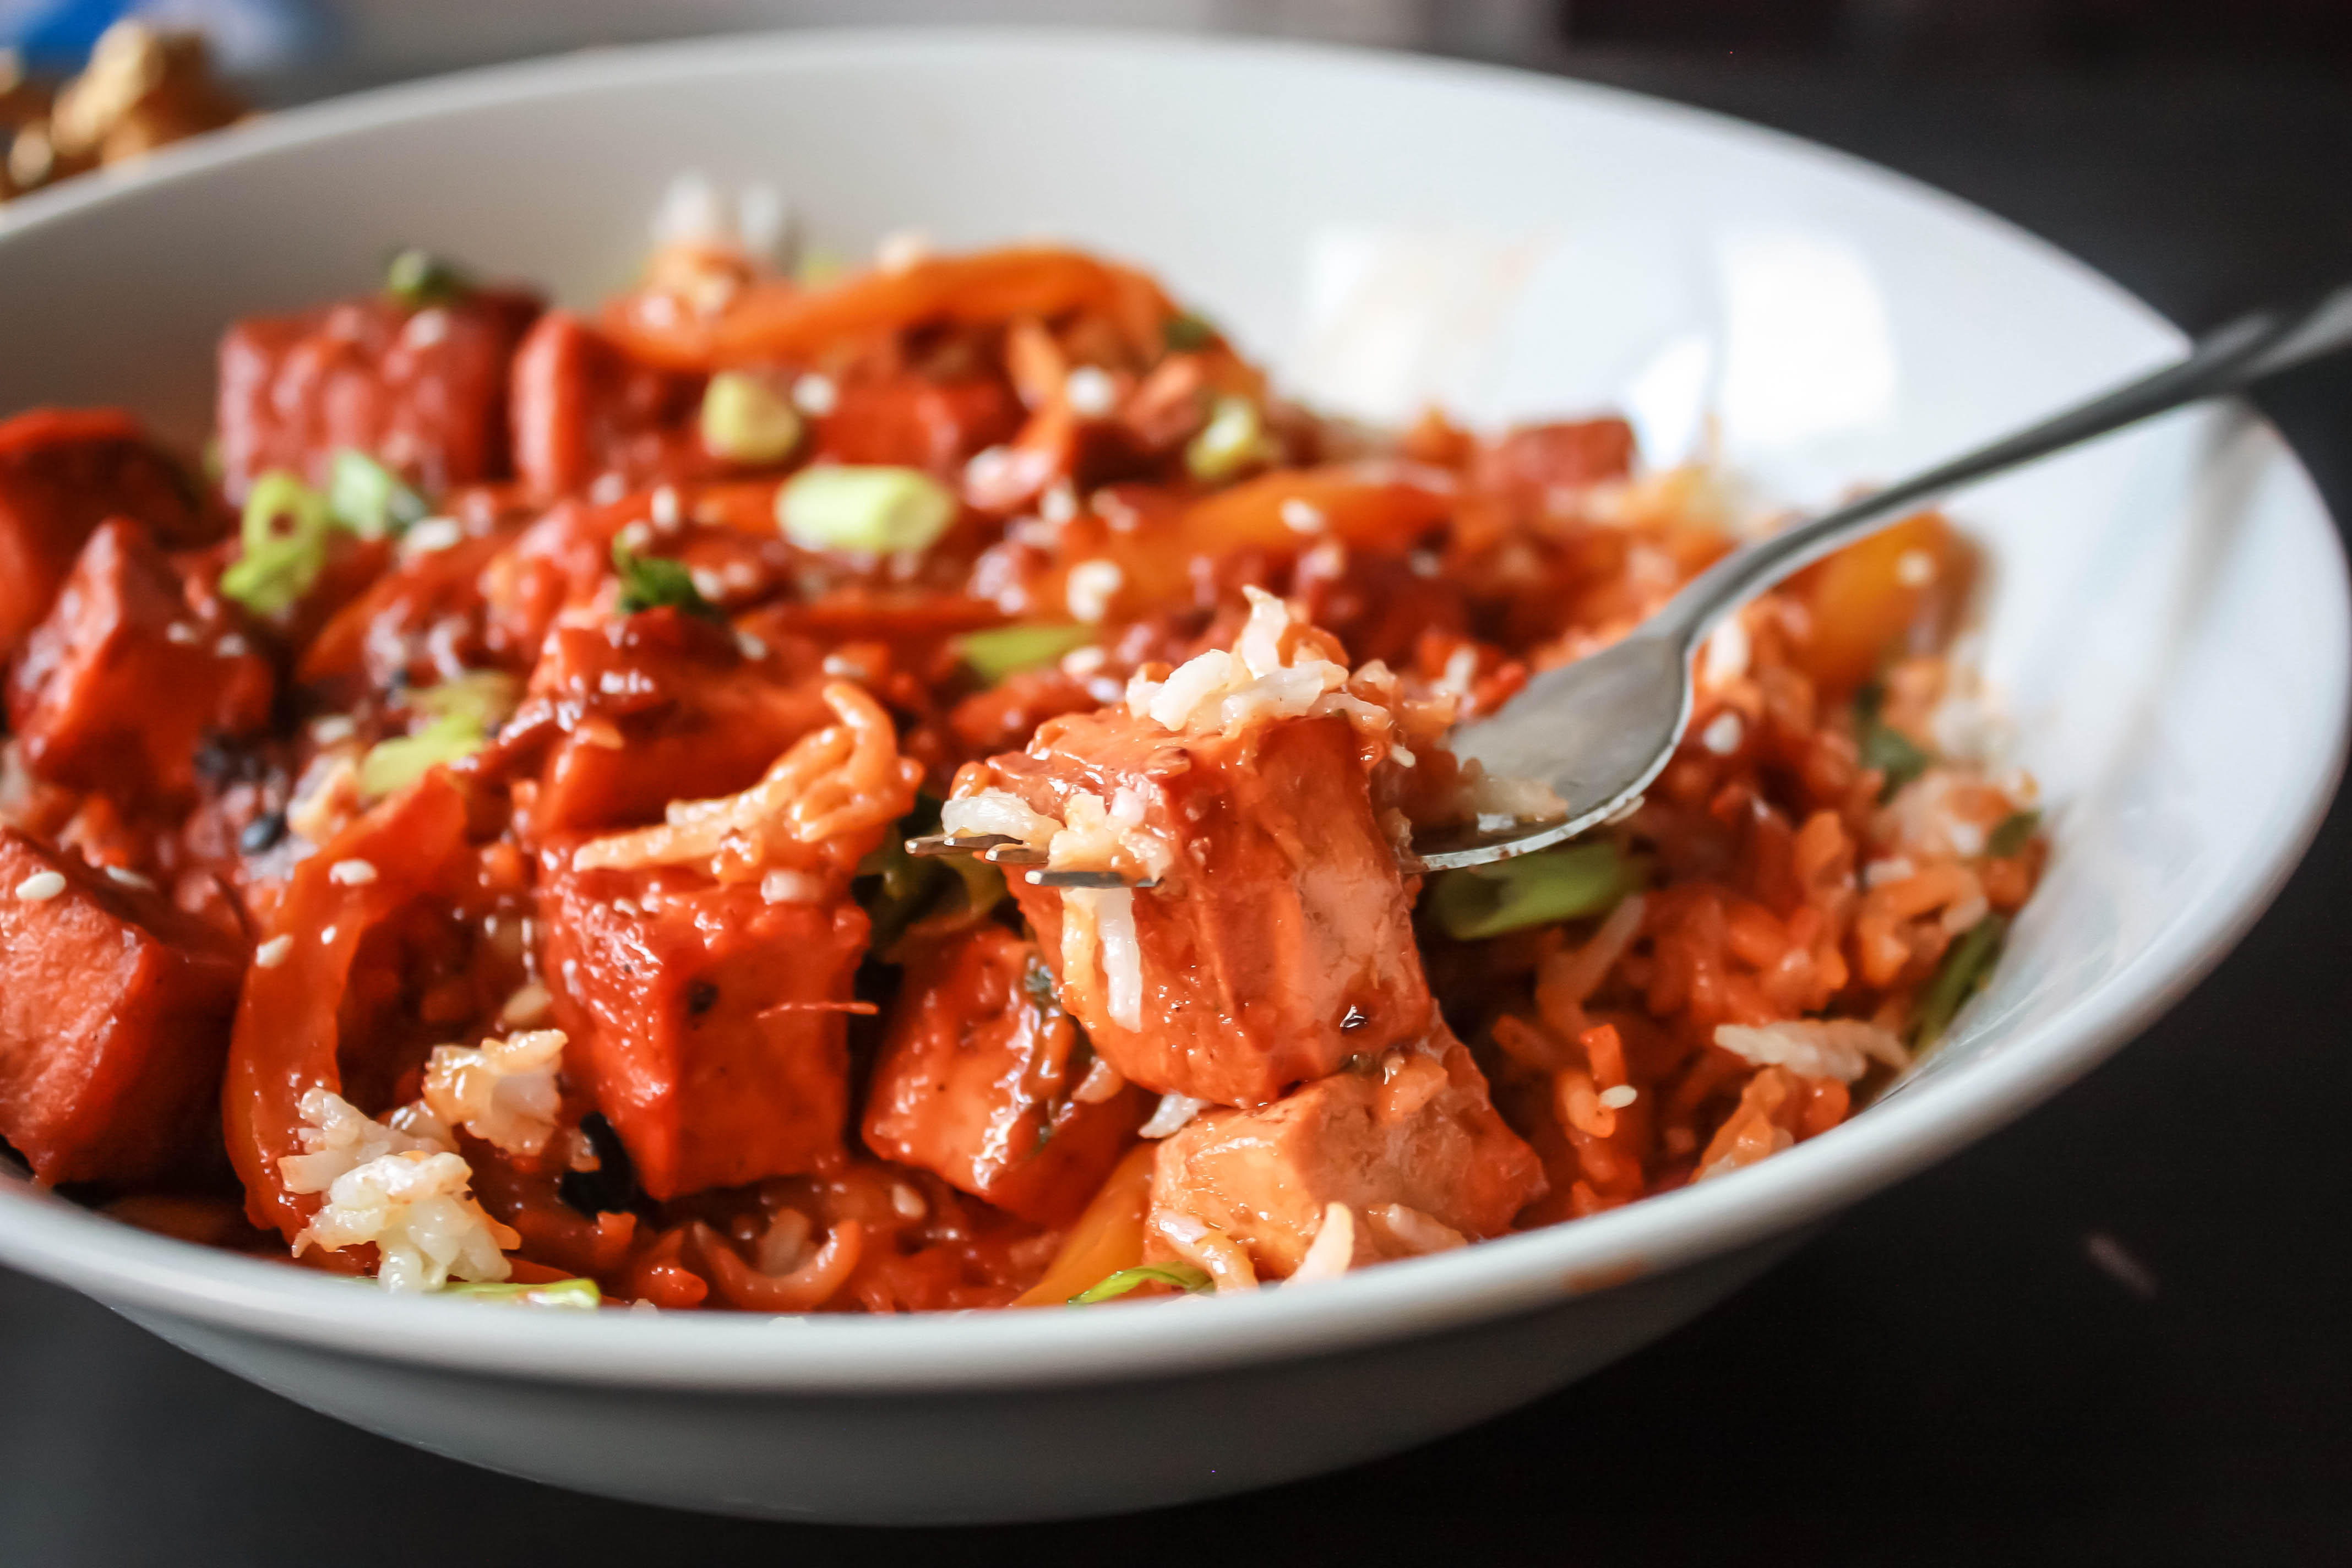
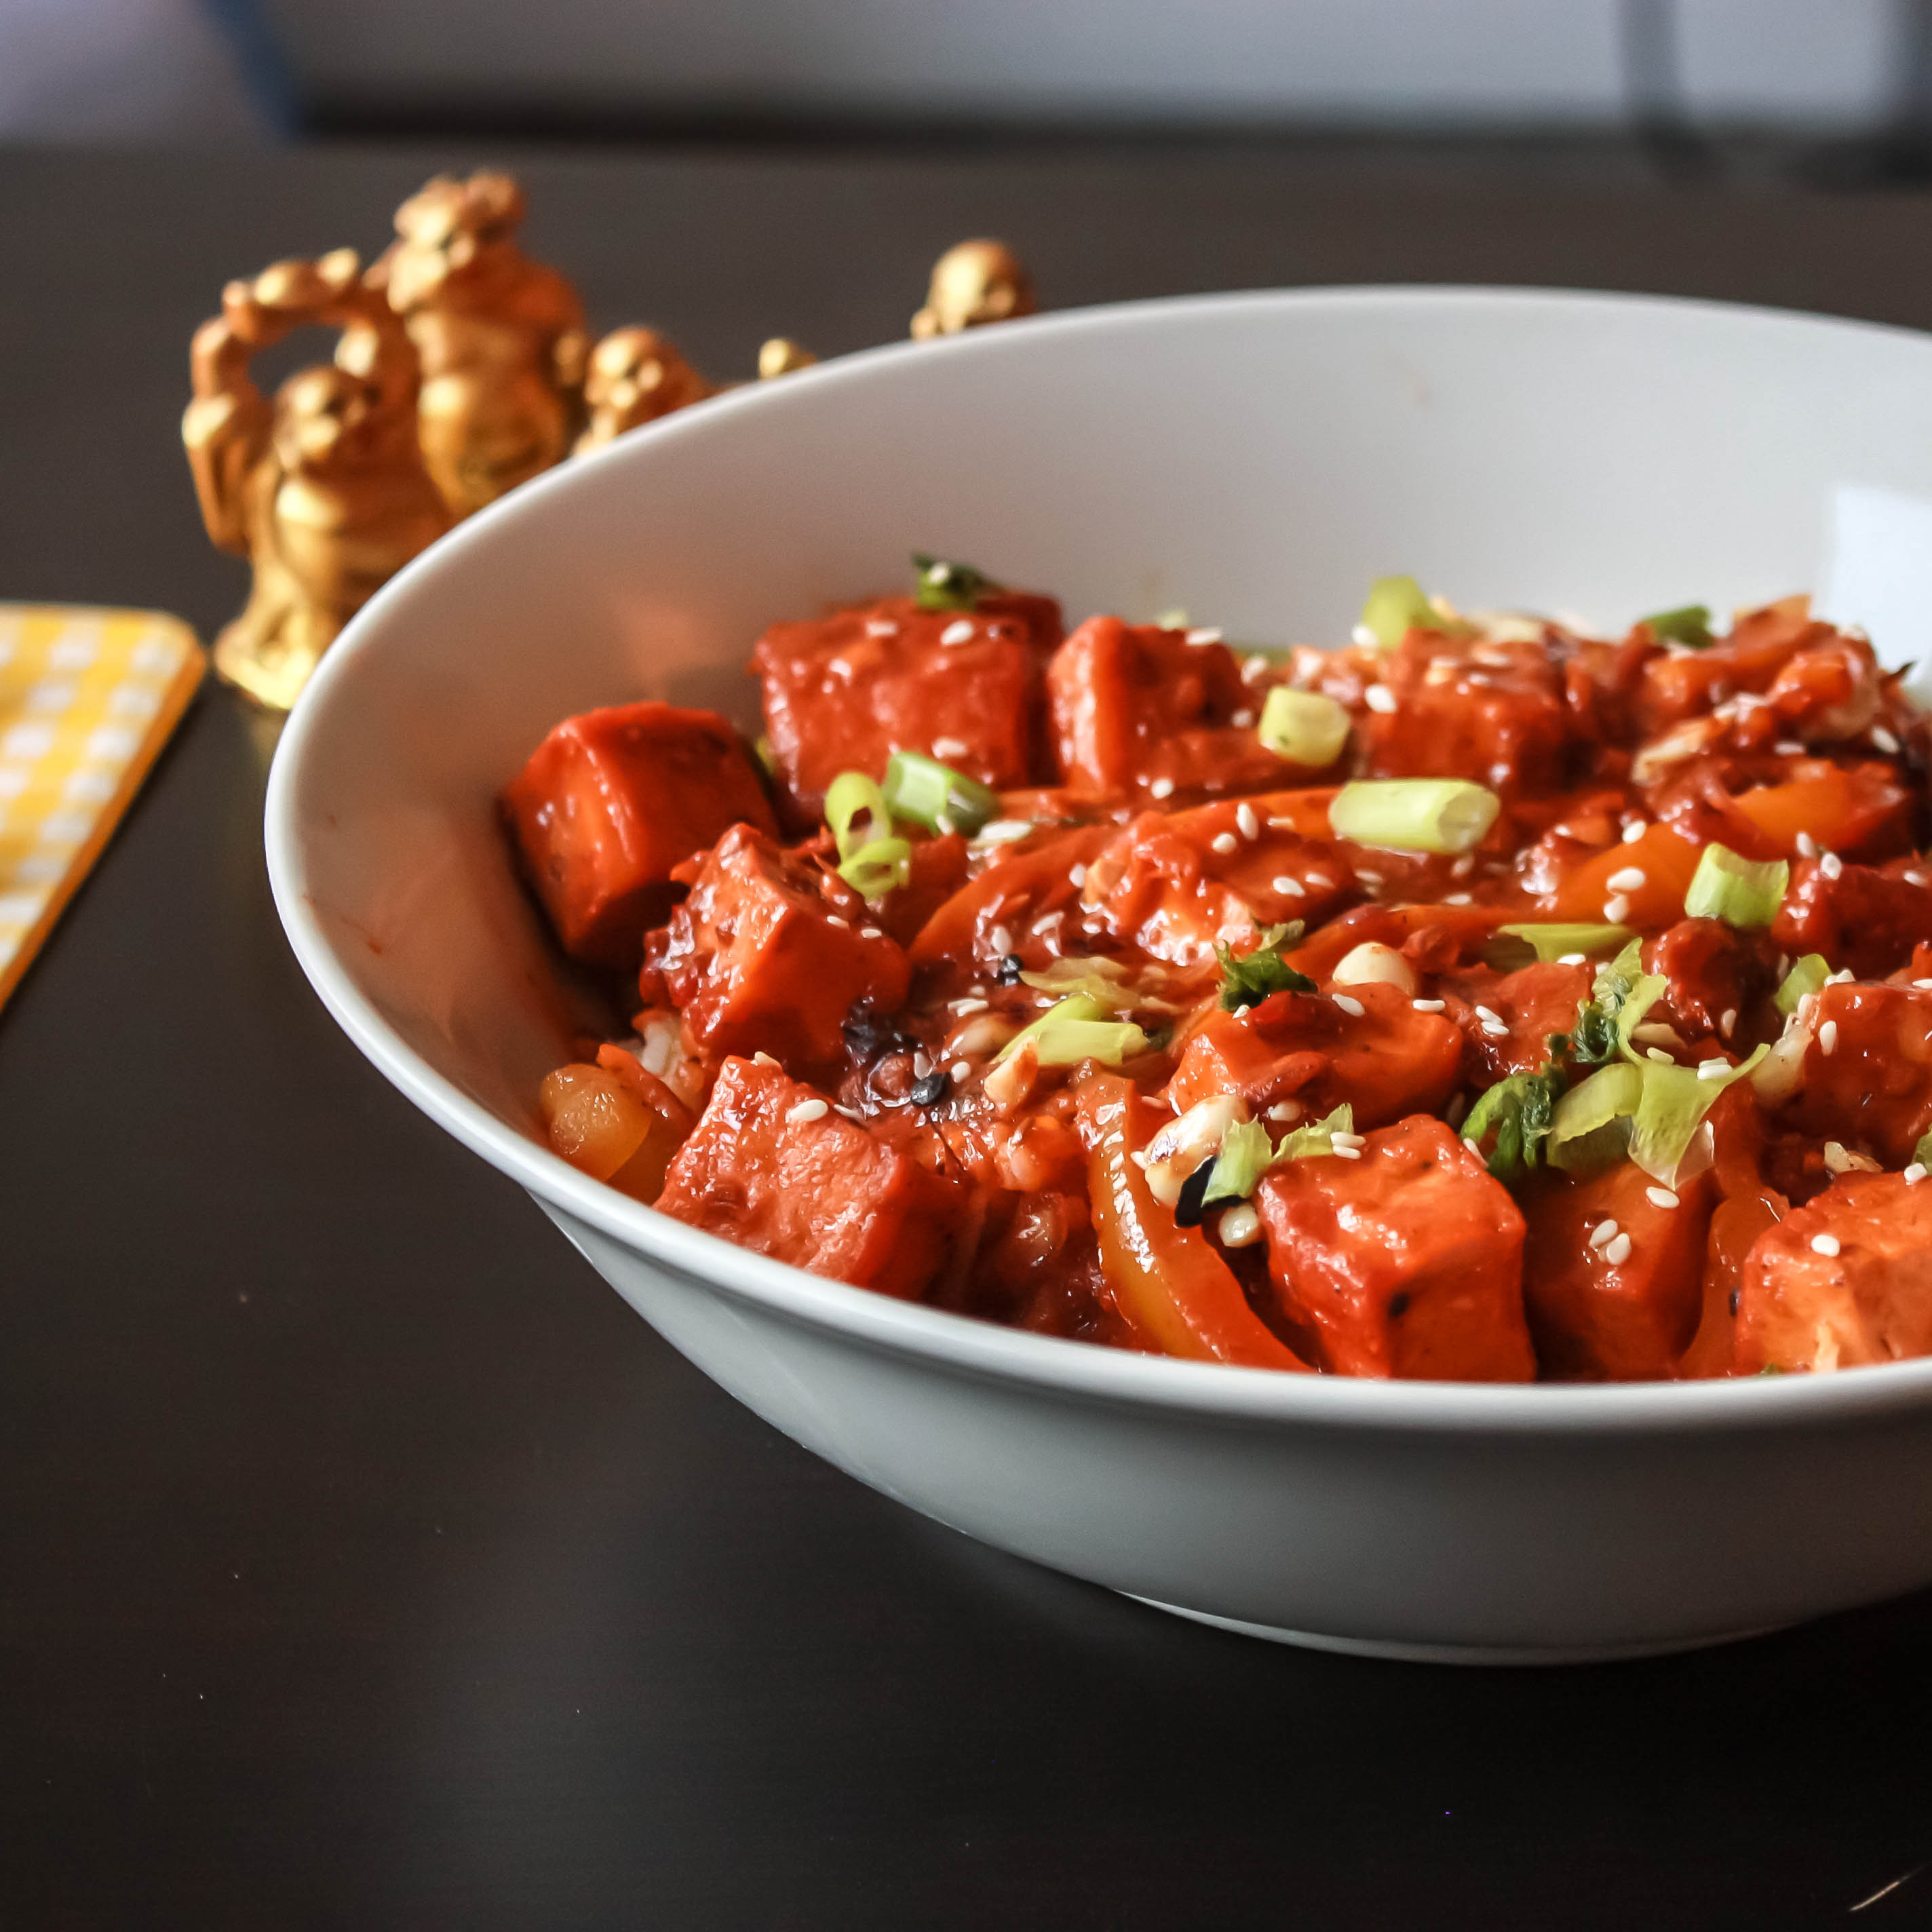
A combination of flavorful homemade tomato sauce, roasted eggplant and fresh mozzarella makes this pasta scrumptious.  Eggplants or aubergines, whether fried, baked sautéed or grilled – each cooking method brings out a different quality of the veggie. Eggplants are the star of this simple dish. The final and most essential touch to this dish is cubed mozzarella.

I tried an eggplant pasta dish in a restaurant few months back. After experiencing the eggplant in pasta, I always go with this combo with no fear when I go out or when I cook at home. I knew that it was a simple dish that could be re-created at home, if done correctly. Eggplants when cooked give a wonderful texture. But, because they are spongy, they can soak up too much moisture or oil and become soggy if not cooked properly. Baking this eggplant requires a lot less oil and is much easier than frying in a pan. It is certainly a simple dish, but it’s very satisfying.

The way to season everything perfect is by seasoning everything along the way. Season your eggplant with salt and pepper before baking it, season your tomato sauce with salt and pepper, and also your pasta water with salt. Be careful not to season them more as we are adding cheese at the end which will give some additional salt. So, when we bake them with salt, it removes some of the moisture in the dish. This method helps to retain the texture of the eggplant.

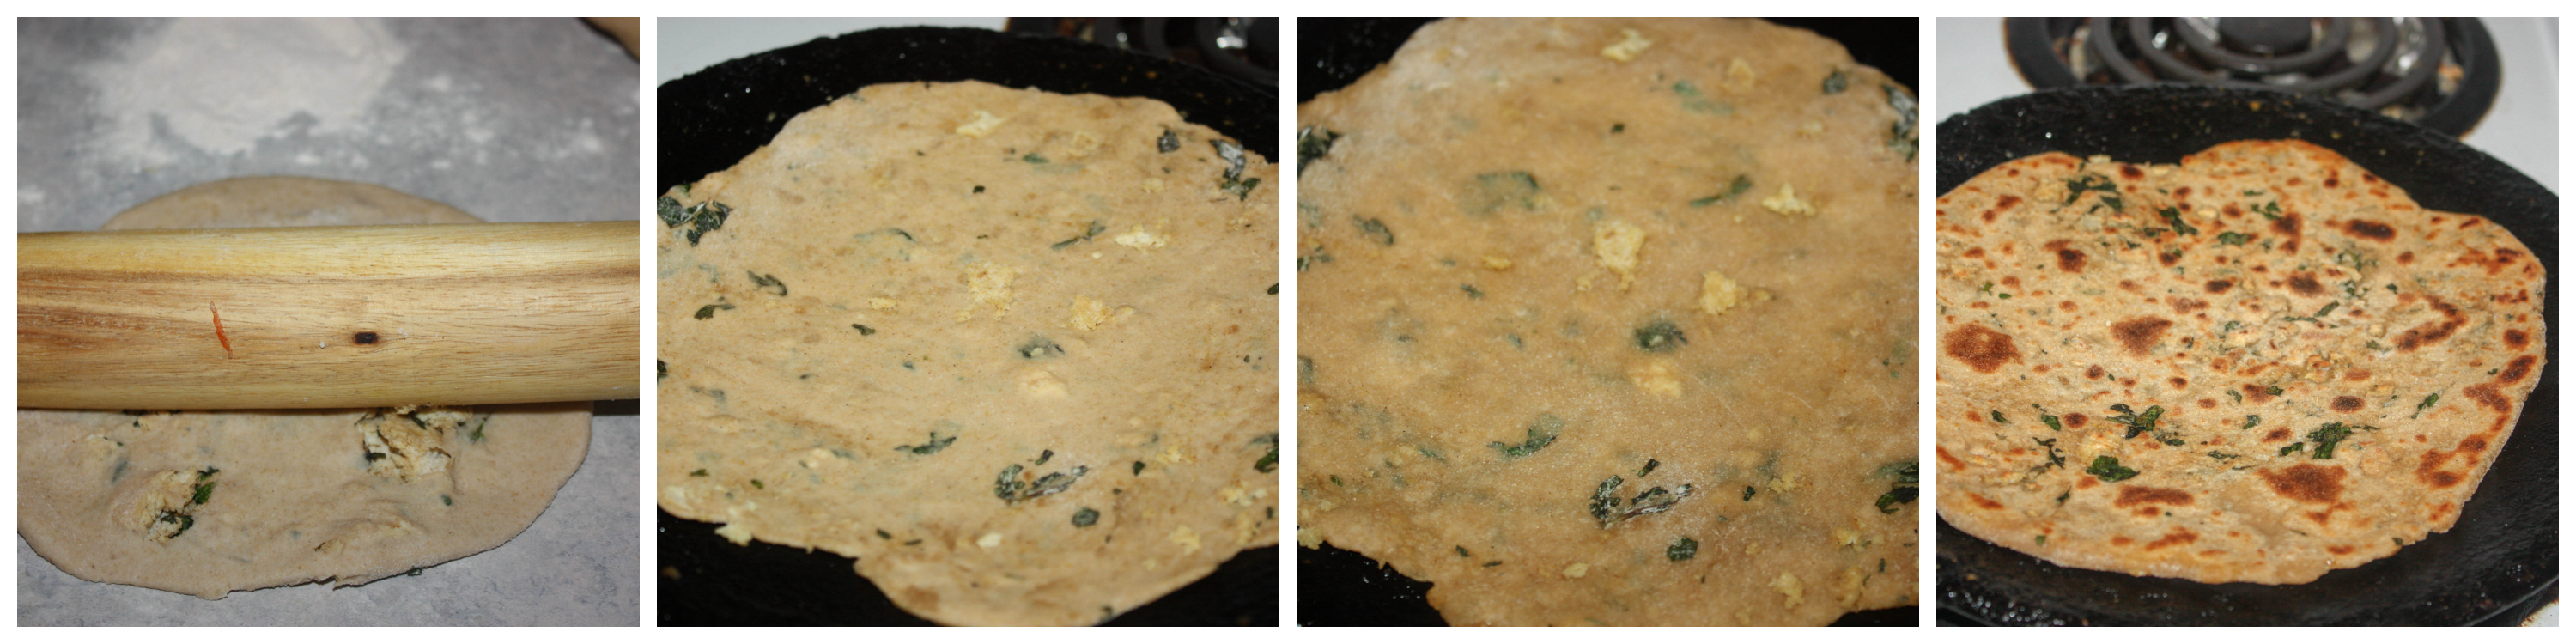
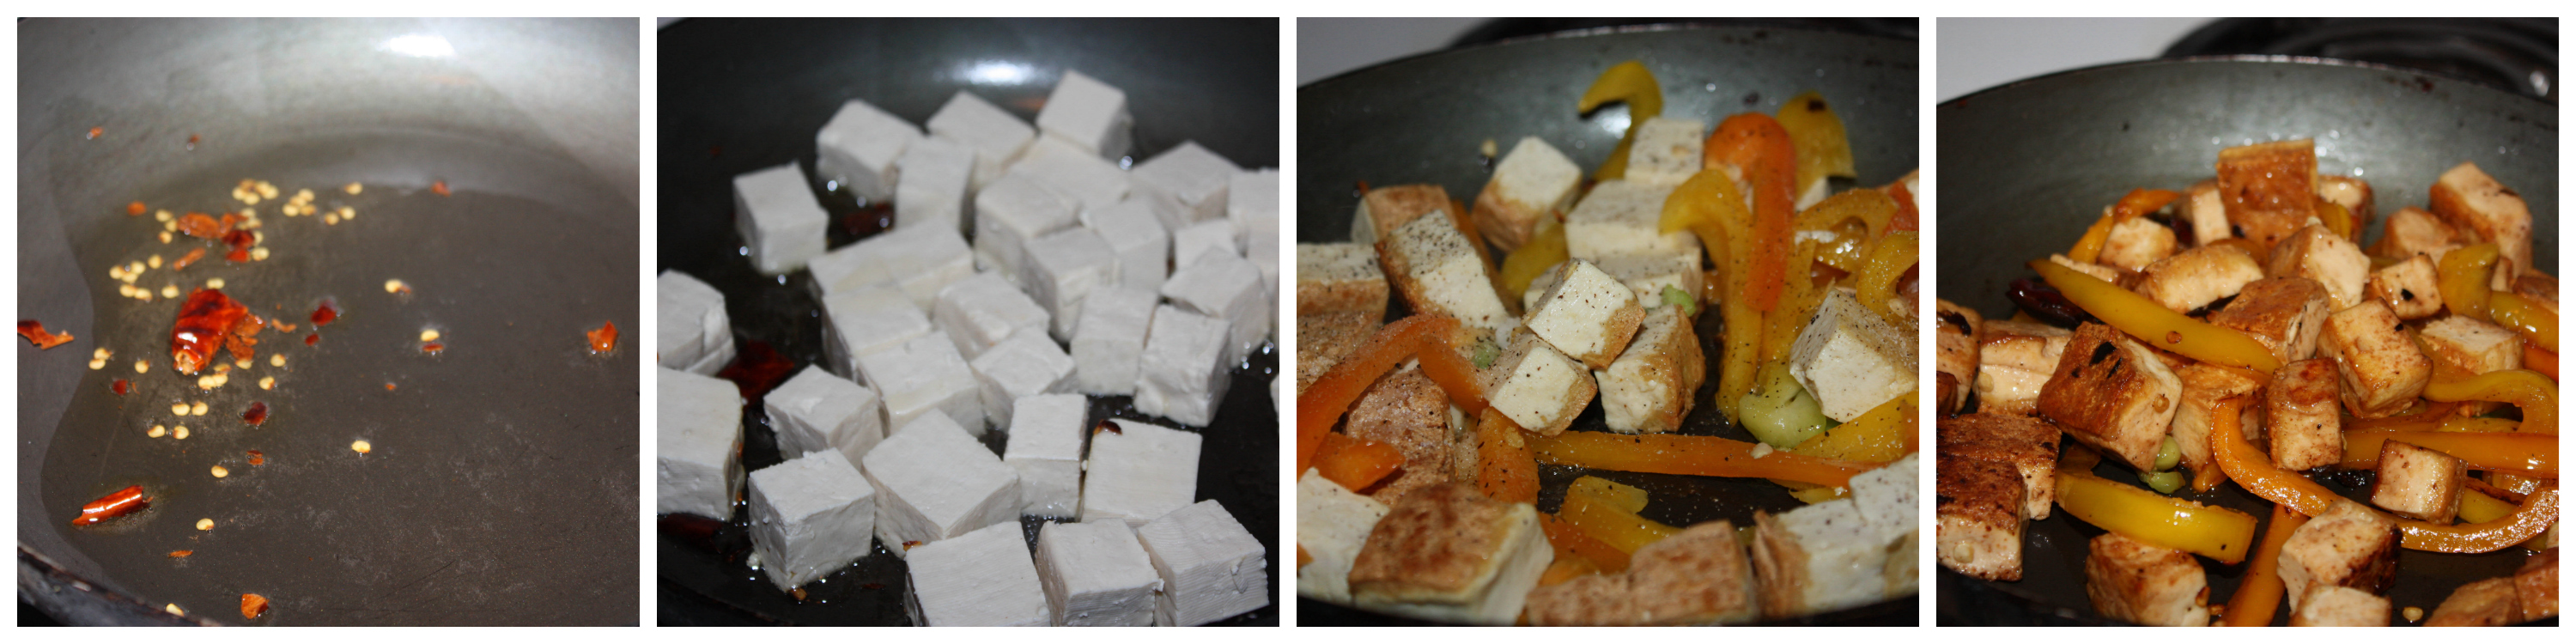
I cut the eggplants pretty big because if you cut them too small, they won’t hold the shape when you roast them. I am placing them in a aluminum foil when baking because it’s easy to clean up 😉  no other reason! When it gets roasted, it gets caramelized at the edges and that gives great flavor.

You can refer on how to boil pasta perfectly page for a perfect pasta.

Print
ROASTED EGGPLANT MOZZARELLA ZITI PASTA
Author: Suganya Hariharan
Recipe type: Main
Cuisine: Italian
Prep time:  10 mins
Cook time:  40 mins
Total time:  50 mins
Serves: 5
 
Ingredients
  • Pasta: ½ lb (Ziti)
  • Eggplant –1 large, Skin peeled and cut into large cubes.
  • Olive oil – 2 tbsp.
  • Red Chilli flakes – 1 tsp.
  • Onion – 1 cup, chopped
  • Garlic – 2 cloves, minced
  • Italian Peeled crushed tomatoes – 1 can – 28oz
  • Parmiggiano Reggiano – ¼ cup
  • Fresh Basil – Chopped
  • Mozzarella – 1 cup, cubed
  • Salt and pepper – as needed
Instructions
  1. Preheat your oven to 350 degrees, line a baking sheet with aluminum foil and set aside.
  2. Fill a large pot of water, sprinkle some salt and bring to a boil.
  3. Add the cubed eggplant to a baking sheet and drizzle some olive oil, season with salt and pepper. Toss them well. Bake for 30 minutes.
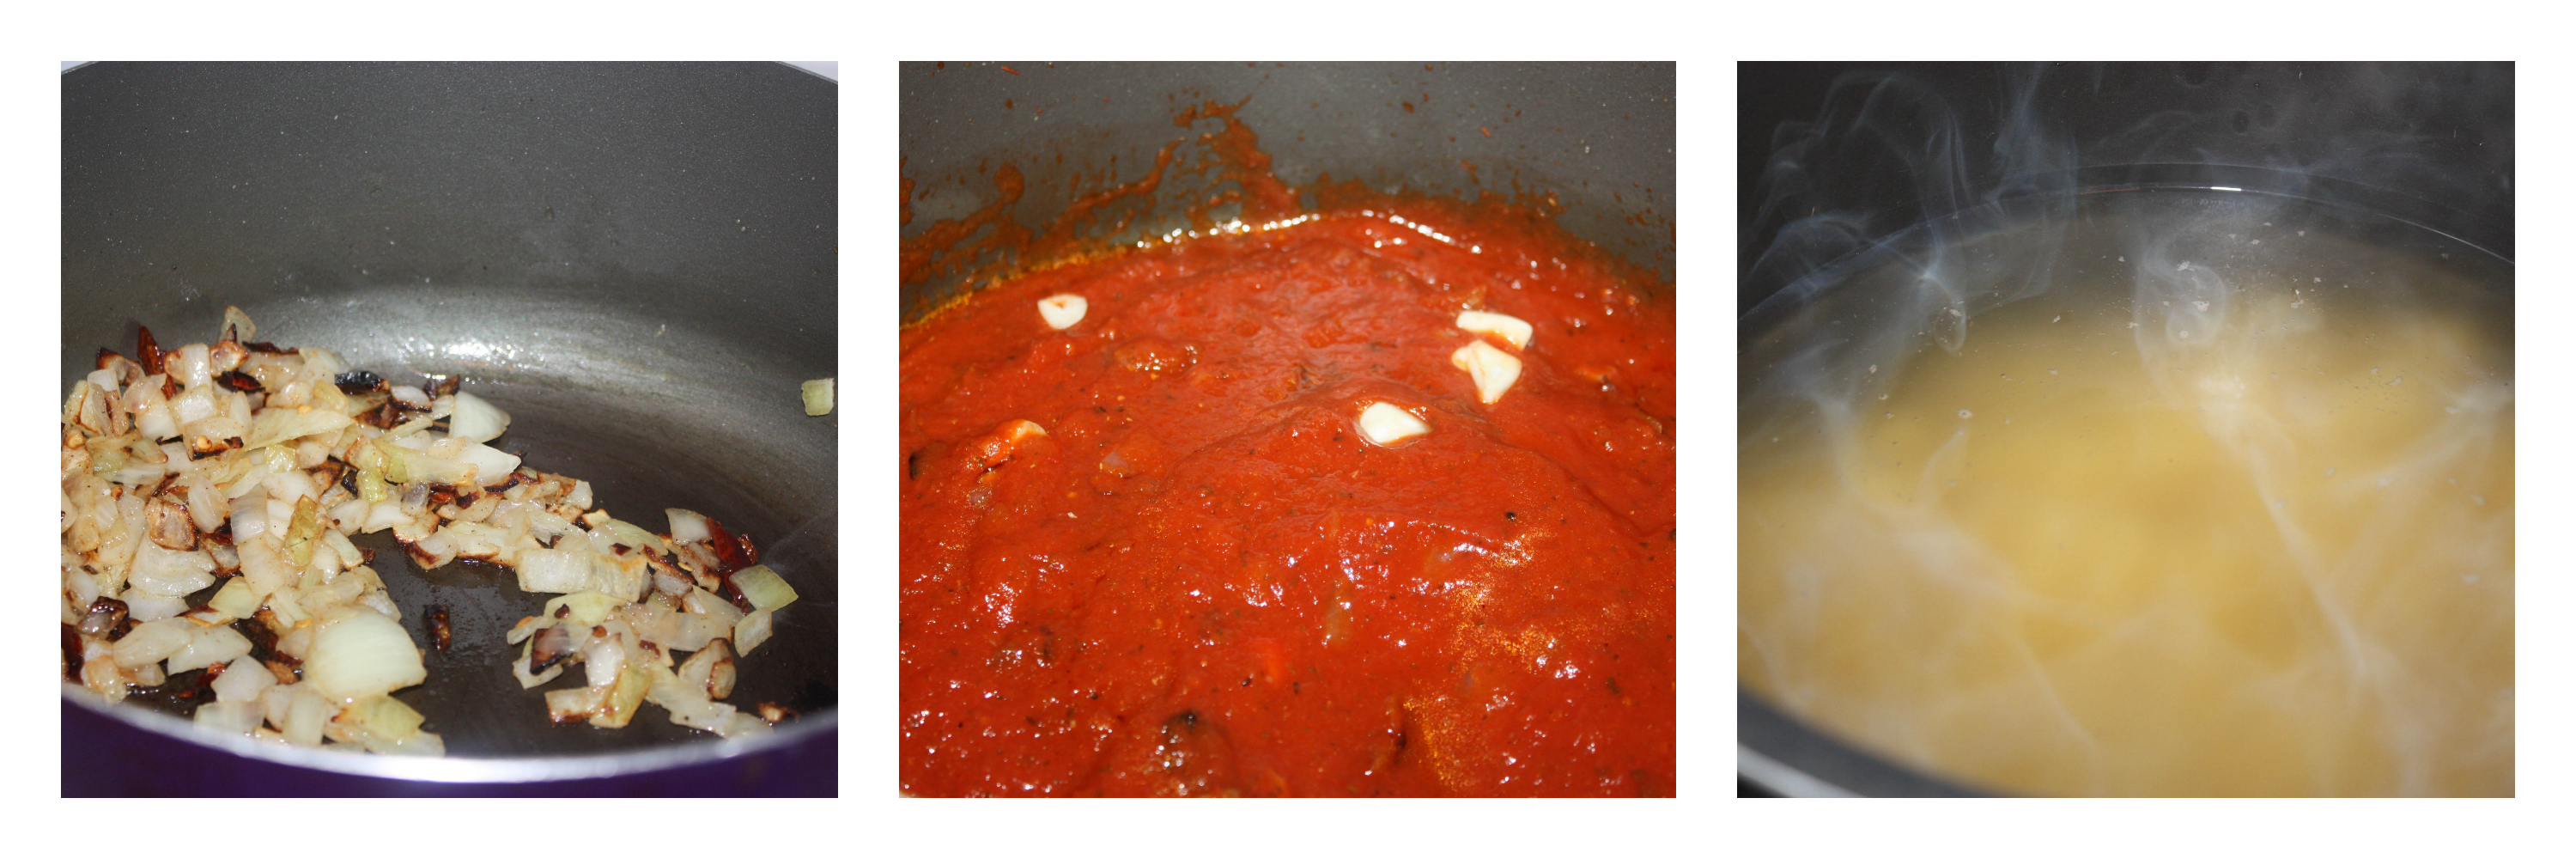
  4. Heat the oil in a large frying pan. Add the chilli flakes, onion, garlic and cook over medium heat for 5 minutes till the onions have turned golden brown.
  5. Add the tomatoes and season with salt and pepper. Simmer for 20 minutes until the sauce thickens.
  6. Now add the eggplant and simmer for ten minutes.
  7. This is the right point where you add the pasta to the boiling salted water and cook according to the packet instructions. I cooked for 8 minutes. Drain well.
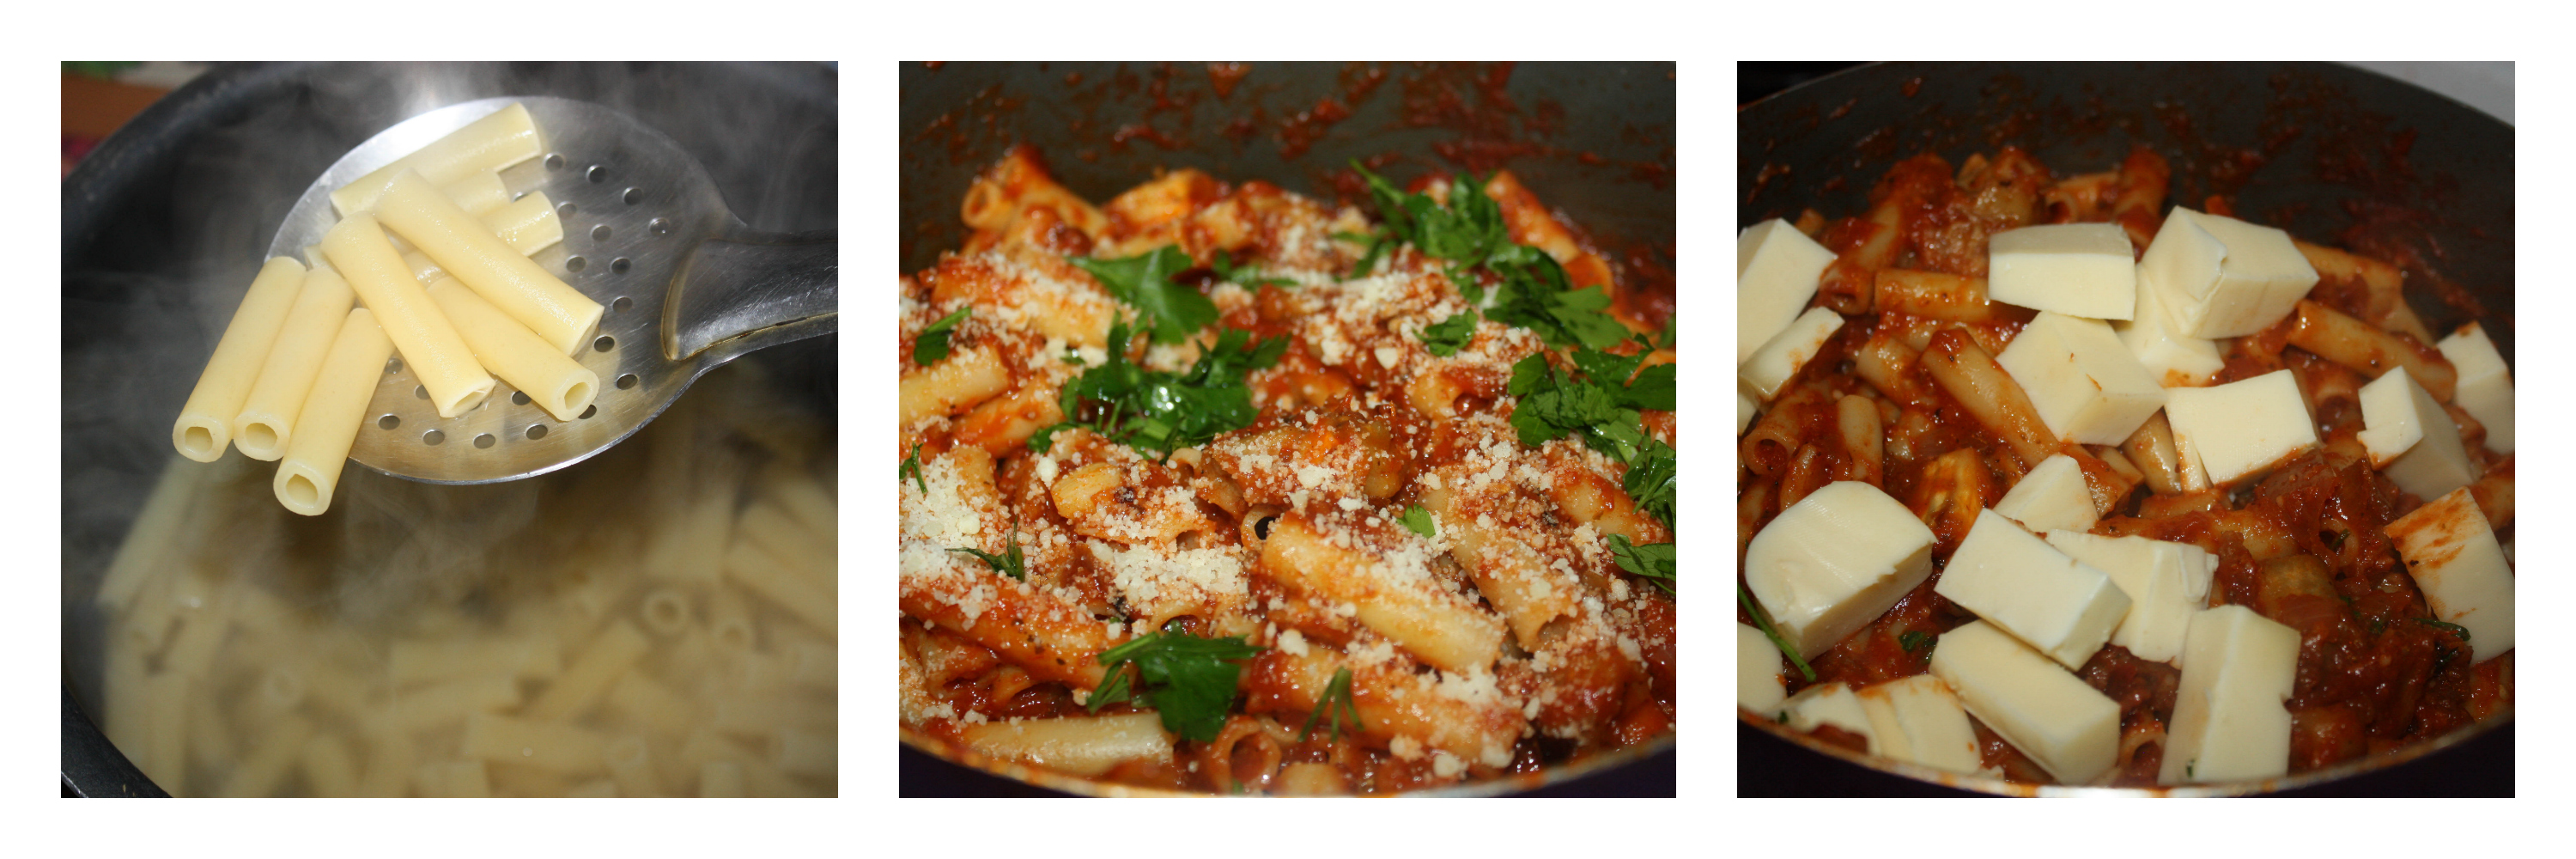
  8. Add the pasta to the sauce and garnish with parmiggiano and basil. Toss them all together nicely.
  9. Now add the cubed mozzarella when it is hot (important!), toss it well, this will melt the cheese from the heat of pasta.
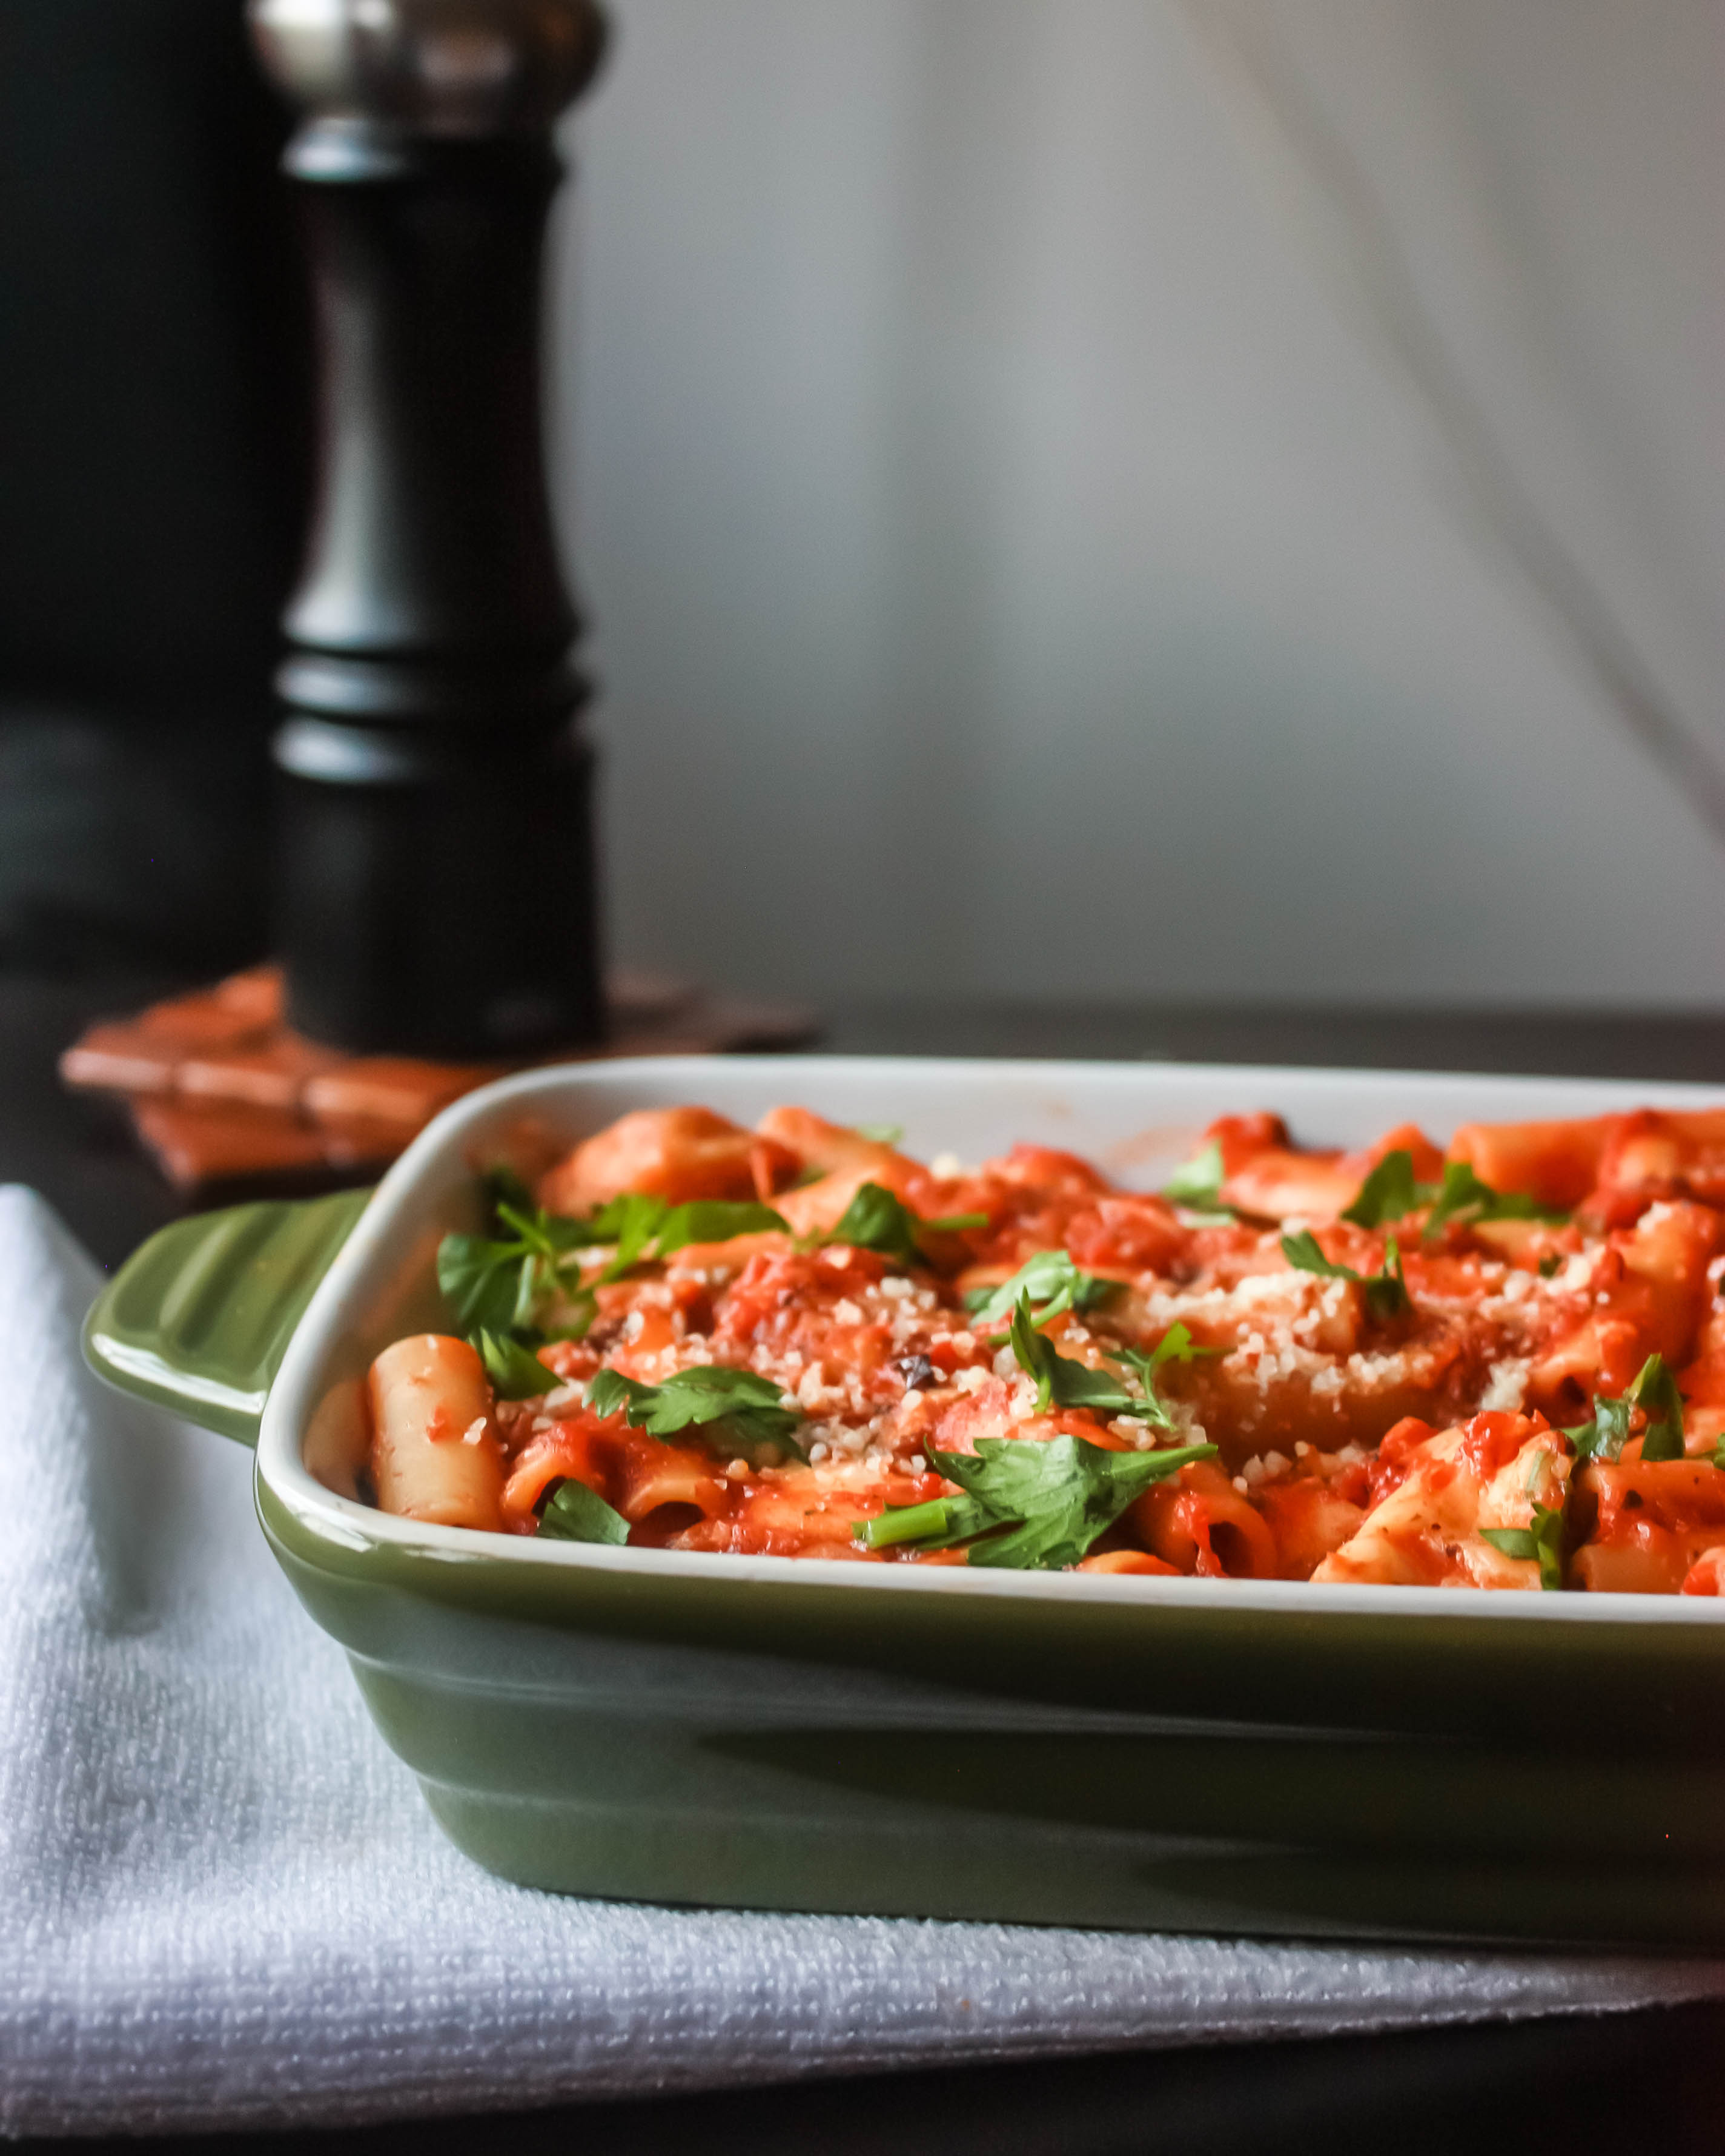
  10. Serve right away or reheat and serve to feel the mozzarella melting in mouth.
Notes
1. you can use fresh tomatoes too instead of canned tomato.
2. I used ziti, you can use any like penne, rigatoni.
Wordpress Recipe Plugin by EasyRecipe
3.2.1311

RoastedEggplantMozarella1

Filed Under: BAKED RECIPES, PASTA PIZZA & TACOS Tagged With: eggplant recipe, mozarella pasta, pasta eggplant tomato suace, pasta recipe, pasta siciliana, quickandeasy pasta, roasted eggplant recipe, tomato sauce pasta

Ginger Rice

September 28, 2014 by Suki 5 Comments

gingerricename

gingerricenameGinger rice is quick and aromatic, cooked with ginger, cumin and onion.

This recipe is very simple & humble. It goes well with any north Indian curries or gongara curry. Even it taste great with asian gravies. Ginger rice is a relatively easy dish to prepare. I have cooked the rice in a kadai/pan, but you can also cook in pressure cooker. Ginger has lot of healthy benefits so its good to have ginger rice once in while! Trust me, it does not give a strong ginger flavor. It gives the right taste.

5.0 from 1 reviews
Print
GINGER RICE
Author: Suganya Hariharan
Recipe type: Main
Cuisine: Indian
Prep time:  5 mins
Cook time:  30 mins
Total time:  35 mins
Serves: 5
 
Ingredients
  • Basmati rice – 2 cups
  • Ginger – 2 inch
  • Garlic – 2, whole
  • Ghee – 2 tbsp
  • Cumin.jeera – 2 tsp
  • Cardomom – 2
  • Bay leaf – 1
  • Onion – 1, sliced
  • Cashews – 3, chopped - garnish
  • Green chillies – 2, slit
  • Mint – ¼ cup chopped car
  • Water – 4 cups
  • Coriander leaves – Garnish
  • Salt – as required
Instructions
  1. Soak the basmati rice in water for 20 minutes. Drain the rice and keep aside.
  2. Grind the ginger and garlic together, add one cup of water and blend again. Drain the ginger and save the juice. Keep it aside.
  3. Heat a pan, and add oil or ghee.
    ]
  4. On a low or medium flame when the oil becomes hot, add the cumin, bay leaf and cardamom.
  5. Let the cumin get browned, now add the onions and fry till they are golden brown.
  6. Add the mint, cashews, salt and green chillies. Sauté for a minute.
  7. Add the ginger juice, boil for a minute. Now add the rice and stir well. Taste the water for salt. And add salt if needed now.
  8. Close the lid and cook the rice. The way I cook the rice is I cook the rice in medium flame for ten minutes, and low flame for ten minutes, and switch off.
  9. Garnish with coriander leaves.
Notes
You can use cinnamon, cloves or mace/javitri when you add cardomom.
The rice or water gets the nice light brown color because of the caramelized onions.
Adjust the water quantity according to the quality of your rice.
Wordpress Recipe Plugin by EasyRecipe
3.2.1311

Taste great with any gravies. (paneer makhanwala, malai methi paneer)

gingerrice-3

Filed Under: RICE/BIRYANI VARIETIES, VEGAN Tagged With: basmathi rice, garlic rice, ginger juice, Ginger rice, healthy rice, onion rice, quick and easy rice, quick rice, rice flavoured ginger

Coconut Barfi/Coconut Fudge

September 28, 2014 by Suki 8 Comments

Coconutbarfiname

CoconutbarfinameYou will love this dish if you love coconut. It’s made with just coconut and sweetened condensed milk. Isn’t that simple ;). It is usually made during diwali time.  Or you can make it for any festival. You can make them even if there is no festival, no harm :). Kids love coconut a lot. 

Coconutbarfifinal-2

I made them with desiccated coconut. Generally freshly grated coconut makes better barfi. But I used desiccated coconut and found this simple and delicious. There are different ways to make this. But this is my personal way to do a quick coconut barfi. I just wanted to add color to it and try, so added saffron. You can even color powder, but I would say NO. Adding color is not good for health. So I would always prefer saffron.

For cardamon powder, I always grind cardamon and sugar together.

Now the recipe:

5.0 from 1 reviews
Print
COCONUT BARFI/COCONUT SAFFRON SWEET
Author: Suganya Hariharan
Recipe type: Dessert
Cuisine: Indian
Prep time:  60 mins
Cook time:  15 mins
Total time:  1 hour 15 mins
Serves: 6
 
Ingredients
  • Sweetened Condensed milk – 1 cup
  • Desiccated coconut – 1½ cup
  • Ghee/Butter – 1 tsp
  • Milk – 2 tbsp
  • Cardamon – 2, crushed
  • Sugar – 1 tsp
  • Almonds/pistachios – 5, chopped
  • Desiccated coconut – ¼ cup for rolling
Instructions
  1. Dissolve saffron powder in hot water and set aside.
  2. Heat the ghee and toast the almonds/pistachios till it turns golden. Drain and keep it aside.
  3. To the same pan, add the 1-cup of desiccated coconut. Toast for a minute.
  4. To the same pan, pour the condensed milk on it. Mix well and cook on low flame.
  5. Crush the cardomon and sugar. Add it to the pan and add the two tbsp of milk.
  6. Cook it until the mixture gets quite thick. It will take around 6 mins. If you have doubt to when you can switch off the heat, it is when the spatula will refuse to get stir any more and mixture will almost stick to your spatula.br]
  7. Divide the mixture into two equal parts, and keep one part aside. And add saffron water to the other and stir it till the water gets evaporated. Switch off the mixture when it is in right consistency.
  8. On a butter-greased plate, add the saffron mixture, tap it with a ghee-coated spatula to flatten it. Top with the plan coconut mixture and flatten top.
  9. Place it in fridge to cool for an hour. Then cut the mixture into square shaped or desire shape.
  10. Season with some desiccated coconut and toasted almonds/pistachios.
  11. You can store them in airtight container up to four days. I refrigerate them as it is coconut based dish.
Notes
1. If you have doubt to when you can switch off the heat, it is when the spatula will refuse to get stir any more and mixture will almost stick to your spatula.
2. You can also use fresh coconut but you can’t store it for long time. So I prefer to use desiccated coconut. And also you have to cook the fresh coconut for a longer time since fresh coconut can be moister.
3. Use ghee/ butter greased spatula to flatten it. Even use a ghee coated knife to cut it easily.
Wordpress Recipe Plugin by EasyRecipe
3.2.1311

Coconutbarfifinal-3

Filed Under: DESSERTS, SWEETS/DESSERTS Tagged With: barfi sweet, coconut sweet, dessert recipes, indian dessert recipes, indian diwali sweets, indian sweet, navrathri recipe

Mint & Tofu Whole Wheat Paratha

September 26, 2014 by Suki Leave a Comment

Tofu_Paratha_name

Tofu_Paratha_nameIt’s a whole wheat bread stuffed with mint and tofu. I often make different type of parathas at home. I make them with almost any vegetable I have in my refrigerator. I just now realized that I have not posted any of it. I will post them one by one.

Parathas can be had as a brunch, lunch or dinner. It taste great with any vegetable curry like paneer makhanwala, malai methi paneer or even with simple pickle or raita. You can replace the same recipe with any vegetable of your choice. But be careful sometimes some vegetable has water retained inside, so you should use less water when you mix the dough. I am here always to answer your questions!

Reason behind mint and tofu paratha is because I had some leftover tofu after the Red Thai Tofu Curry. So I thought of using them on a healthy way. And used mint just to give some extra kick to it. Mint parathas are always good.

I did not use any salt in this recipe. I always don’t add salt to my paratha or chapathi recipe. Its almost the same and healthy. For making/frying the parathas in the pan, you can fry with sunflower oil, sesame oil or ghee. I fry the parathas sometimes with no oil or sometimes with sesame oil. But for guests, I make with ghee 😀

Print
MINT & TOFU WHOLE WHEAT PARATHA
Author: Suganya Hariharan
Recipe type: Main
Cuisine: Indian
Prep time:  20 mins
Cook time:  20 mins
Total time:  40 mins
Serves: 6 parathas
 
Ingredients
  • For the dough
  • Wheat flour - 1 cup
  • Oil -1 tbsp
  • Salt
    For the stuffing:
  • Tofu – 1 cup, crumbled or grated
  • Mint – ¼ cup finely ch0pped (small size)
  • Ginger - 1 tsp finely chopped ginger
  • Green Chilli- 1 finely chopped
  • Cumin /Jeera seeds - 1 tsp
  • Methi dry leaves – 2 tsp
  • Chilli powder - ½ tsp
  • Garam masala powder - ½ tsp
  • Coriander powder - 1 tsp
  • Salt needed (I did not use any)
Instructions
  1. Mix all ingredients under “for the stuffing”. Keep it aside.
  2. Take the 1 cup of wheat flour, add 1 tbsp oil, salt needed (optional) and make soft dough by adding water little by little. Make it a point that you did not add extra water or else it will become sticky. If so, add some extra flour and knead again. Adjust the wheat flour and water alternatively. When it is kneaded well, soft and not sticky, cover it and let it sit for 20 minutes.
  3. Now make 5 to 6 equal sized balls out of that dough.
  4. Roll into small chapathi, place a tbsp of stuffing on the top, bring the edges together and join them in the center.
  5. Now sprinkle some flour so that you can roll it easily. Roll gently into a paratha about 7-8 inches diameter. Tearing may happen in few places, but that’s very much ok. But make sure there is not a lot of dough that tears up.
  6. Place the paratha on a hot griddle. Wait for bubbles to appear, then apply a tsp of oil /ghee on the top and flip it over.
  7. Spread oil on the other side and cook both sides well till brown spots appear.
  8. Remove and serve it with curries/pickle or raita.
Wordpress Recipe Plugin by EasyRecipe
3.2.1311

Serve it with curry, raita or pickle.

Filed Under: BREAD/PARATHA, VEGAN Tagged With: chapathi recipe. indian recipe, indian bread recipe, mint recipe, tofu, tofu mint paratha, tofu paratha

Cucumber Carrot Raita/Cucumber carrot yogurt dip

September 24, 2014 by Suki Leave a Comment

Cucumber_carrot_raita_name2

CucumberCarrotRaita_name1Cucumber raita is one of the simple and easy recipes. Cucumber raita rehydrates body and replenishes daily vitamins. Actually you don’t have a recipe. It’s just you need to mix them all together. But it’s one of the raita you can even have direct without no rice or roti. You can have this as side to rotis, biryani or as a dip. It taste great as a dip.

Some squeeze out the water and directly add the grated cucumber to the curd but I like to add it to retain its nutritional values. You can just make plain cucumber raita. But I wanted to make it more healthy and colorful by adding carrot.

You can make raitas with pretty much any vegetable. You can make onion raita, pomegranate raita, boondi raita, okra raita, carrot raita, mango raita, pineapple raita..  etc. My favorite is boondi raita. And the next is cucumber raita. It’s very good for health.

Print
CUCUMBER CARROT RAITA
Author: Suganya Hariharan
Recipe type: Sides
Cuisine: Indian
Prep time:  10 mins
Total time:  10 mins
Serves: 4
 
Ingredients
  • Cucumber – ½ medium sized
  • Carrot – ½ medium sized
  • Curd/plain yogurt – 1 cup
  • Roast Cumin seeds powder - 1 tsp
  • Chaat masala – 1 tsp (optional)
  • Salt – as needed
  • Coriander – to garnish
Instructions
  1. Wash the cucumber. Peel the cucumber and chop it very finely.
  2. Wash the carrot. Peel the carrot and chop it very finely
  3. In a bowl, beat the yogurt till smooth.
  4. Add the cucumber and carrot to the yogurt.
  5. Add the cumin powder,chaat masala and salt.
  6. Garnish with coriander leaves.
Notes
1. You can spice it up by sprinkling some chilli powder.

2. You can even grate the cucumber instead of chopping. But I like to feel the cucumber in my mouth.
Wordpress Recipe Plugin by EasyRecipe
3.2.1311

It serves best as a dip, as a side for rice, biryani or roti. Healthy to have as a snack.

Cucumber_carrot_raita_name2

Filed Under: RAITA/DIPS/CHUTNEY Tagged With: carrot cucumber yogurt, carrot raita, cucumber raita, cucuumber carrot raita, healthy snack, healthy yogurt, raita recipe

Chickpeas sundal/ Kondakadalai sundal

September 24, 2014 by Suki 2 Comments

ChickpeasSundal_name

ChickpeasSundal_nameChickpeas Sundal is a common recipe in south India. It is made with boiled chickpeas and tempered with blended spices. You can make the same recipe with black channa or with any lentils. It is very simple and a healthy snack. I did this for navrathri.  I have explained about Navrathri on my peanut sundal recipe😉 If someone wants to read :D. The most common sundal recipes for festivals are chickpeas sundal and green peas sundal. But you don’t need a festival to do this. 😉   this is a basic sundal version that we make for navarathri.

If you are using fresh Chana, soak them overnight. You can use it next day. I used the frozen channa so it was even easier. You can use this recipe to make any variety of sundal recipes. Just replace with those lentils/beans.

You can serve this as a snack or as a side dish for rasam.

5.0 from 1 reviews
Print
CHICKPEAS SUNDAL/ KONDAKADALAI SUNDAL
Author: Suganya Hariharan
Recipe type: Side dish, festival
Cuisine: Indian
Prep time:  5 mins
Cook time:  10 mins
Total time:  15 mins
Serves: 4
 
Ingredients
  • Fresh /Frozen chickpeas - 1 cup
  • Salt - To taste
    To blend to a coarse paste:
  • Grated coconut - 2tbsp
  • Green chillies -2 small
  • Coriander - 1 tbsp
  • Ginger- small piece. Very small.
  • Jeera - ½ tsp
    Temper:
  • Oil - 2tsp
  • Mustard seeds - 2tsp
  • Curry leaves - 6
  • Red chilli - 1
  • Hing - a pinch
Instructions
  1. If you are using fresh dried variety of chickpeas, then soak them overnight or atleast for 4 hrs. Pour enough water,salt and pressure cook for 3 whistles. The skin might come out, just discard them. I am using frozen chickpeas, so i just washed them and kept it aside.
  2. Transfer the ingredients listed under "to blend to a coarse paste" into a blender and blend them to a coarse paste. set aside.
  3. Heat a pan with the oil; add the list under "temper" in that pan.
  4. Add the chickpeas and salt, toss them for two minutes. Add the blended mixture on top of it. Saute them for two - three minutes until the raw smell of green chillies leaves. Switch off and serve !!!
Wordpress Recipe Plugin by EasyRecipe
3.2.1311

Chickpeas sundal

Filed Under: SNACKS & APPETIZERS FESTIVAL, VEGAN Tagged With: chick peas snack, chickpeas recipes, chickpeas sundal, festival recipes, INDIAN RECIPE, kondakadalai nack, kondakadalai sundal, navrathri recipes

Verkadalai Sundal/Peanut snack

September 24, 2014 by Suki Leave a Comment

Peanutsundal_name

PeanutSundal_name
Verkadalai sundal (peanut sundal) is a guilt-free protein rich snack made with peanuts and loaded with homemade spice powder. It is quick to prepare and peanuts are rich in protein. This sundal is made by boiling peanuts and then tempering with few spices. It’s a healthy snack. It is one of the sundal varieties made during the 9 days of the Navrathri festival. “Nava” means 9 and “rathri” means “Nights”. It is celebrated by making steps with dolls called “Gollu” and guests are invited to come and sing devotional songs in their house. They offer snacks & sweets as Prasad.  I have grown up watching this festival at my place. My mom used to be so busy these 9 days and she used to drag me wherever she goes, she makes me sing in the houses I visit, they give me in return some snacks and gifts :D. My mom used to dress me up each day differently as if I am participating for a fancy dress competition and she will send me with my sister to neighborhood places to invite them for our gollu 😀 It’s so funny and nice to relish all those memories.


Roasted salted peanuts will not work for this recipe. Otherwise you can use any kind of peanuts readily available in market. Peanuts are very healthy, simple and delicious. Most houses have peanuts at their house. So, you don’t have to go shopping for this.  Raw mango gives an extra kick to sundal 🙂 I like to add it but I could not find it nearby, add grated ones if you get it.

Sundals are simple to make and a healthy snack. So even if you don’t keep gollu 😉 like me, do make sundal and eat.

Today being the second day of navrathri, here goes my recipe:


Print
VERKADALAI SUNDAL/ PEANUT SNACK
Author: Suganya Hariharan
Recipe type: Side dish
Cuisine: Indian
Cook time:  15 mins
Total time:  15 mins
 
Ingredients
  • Peanut – 1 cup
  • Salt – as needed
  • Asafoetida – a pinch
  • Grated coconut – 3 tbsp
    To roast and grind:
  • Oil – 1 tsp
  • Channa dal/ kadalai paruppu – 1 tbsp
  • Coriander seeds – 1 tsp
  • Pepper – 1 tsp
  • Red Chilli – 2
  • Jeera/cumin seeds – 1 tsp
  • Asafoetida – a pinch
    To temper:
  • Oil – 2 tsp
  • Mustard – 1 tsp
  • Urad dal – 2 tsp
  • Curry Leaves – few
Instructions
  1. Soak peanuts for an hour (optional). Pressure cook peanuts with water just enough to immerse the channa completely. Add salt and asafoetida. Pressure cook for 4 or 5 whistles in a medium flame. Switch it off, drain and keep it aside. Keep it moist.
  2. Heat a kadai and roast the ingredients under “to roast & grind” in the same order as mentioned. Roast until the channa dal turns golden in colour. Blend it when it cools.
  3. Heat the same kadai and temper with the items under “to temper” table. Add the drained cooked peanuts.Stir well.
  4. Add the powdered masala and coconut. Mix well again for a minute in the medium flame.
Notes
1. When you grind them, add jeera and asafetida finally as it will burn.
2. If you use fresh peanuts, no need to soak. Just pressure cook with salt.
Wordpress Recipe Plugin by EasyRecipe
3.2.1311

peanut_sundal_recipe

Filed Under: DRY CURRY SIDE DISH/ STIR-FRY, SNACKS & APPETIZERS FESTIVAL, VEGAN Tagged With: festival special, healthy, healthy savory peanut snack, indian peanut snacks, navrathri special, peanut snack, Peanut Sundal, peanut vegan snacks, perfect snack.Indian snacks, quick navrathri recipes, quick navrathri sundal recipes, quick navrathri vegan recipes, QUick snack recipes, side dish, verkadalai sundal

Mirchi Ka Salan / Green Chilli Curry

September 20, 2014 by Suki 4 Comments

Mirchikasalan1fname

Mirchikasalan1fnameIt’s a popular dish made with fried chillies, peanut, sesame seeds and coconut. The curry goes well with biryani.  Mirchi ka salan is similar to bhagara baigan except that you add chillies instead of eggplant and you add yogurt to it. The mirchis used are longer ones; they are called finger hots here. You can even use banana peppers or any kind of green chillies for this preparation. I guess the only curry I know with chilly is the mirchi ka salan. They are made from healthy ingredients – sesame seeds, peanuts, yogurt and coconut. These ingredients help to tone down the heat of the green chillies in the curry.

I came to know about this dish when I stayed in Hyderabad for few months. This dish really stood out to me, I say that because it’s been 6 years but I still remember this dish very much with other beautiful memories. It goes really well with hyderabadi biryani. Its light spiced, creamy and tangy. It looks really simple and normal dish but it is bursting with flavors. Baigan ka salan is also good with biryani. I will post the recipe soon. This goes well with jeera rice, roti,naan or phulka.

This dish involves a lot more of ingredients than an average dish. But its worth doing and tasting it. Making a Mirchi ka Salan is not the quickest thing you can do and it does involve a lot more ingredients than the average dish. But trust me when I say it’s worth it. I have made many a times and it has never failed. The very first time when I heard this dish, I was like” should I go with it”. Back then I was hungry so I just ordered it. But it was VERY TASTY not just because I was hungry ;). It tasted palatable every time I had it.

Vegan note: replace yogurt with coconut milk.

4.0 from 1 reviews
Print
MIRCHI KA SALAN/ GREEN CHILLI CURRY
Author: Suganya Hariharan
Recipe type: Main
Cuisine: Indian, Hyderabad
Prep time:  5 mins
Cook time:  35 mins
Total time:  40 mins
Serves: 4
 
Ingredients
  • To roast & grind:
  • Peanuts –2 tbsp
  • Sesame seeds – 1 tbsp
  • Coconut – 1 tbsp
    For gravy:
  • Oil – 1 tbsp
  • Red chillies – 2 broken roughly
  • Cumin seeds – 1 tsp
  • Mustard seeds – 1 tsp
  • Fenugreek – 1 tsp
  • Curry leaves – 6-8 leaves
  • Hing - a pinch
  • Onions – 1 large, sliced, 1 cup
  • Salt – as needed
  • Turmeric – 1 tsp
  • Ginger garlic paste – ½ tbsp
  • Red chilli powder – 1 tsp
  • Coriander powder – 1 tbsp
  • Cumin powder – 1 tsp
  • Mint – 1 tbsp, chopped finely
  • Coriander – 1 tbsp, chopped finely
  • Yogurt – ½ cup beaten
  • Green Chillies - 8- 10
Instructions
  1. Slit the green chillies in the middle and remove the seeds. When they are dry add them to oil and fry till they look little lighter shade.
  2. Dry roasts the peanuts in a medium flame. When the peanuts are roasted, add the sesame seeds. When the sesame seeds are golden brown, Add coconut. Keep an eye on this. It gets brunt easily. Add this mixture to the blender and blend it with some water to a fine paste.
  3. , Now add the oil in the pan and when the oil is hot, add the whole red chillies, and then add mustard seeds. And when the mustard seeds crackle, add fenugreek seeds and cumin seeds.
  4. Now add the curry leaves, onions, hing and little salt. Cook the onions till they are golden brown, Add turmeric and ginger garlic paste and cook to remove the raw smell.
  5. Add the blended mixture, cumin powder, red chilli powder and coriander powder to the mixture. Fry for two minute and add some water to it. Cook for fifteen minutes. Stir in between till the oil oozes out nicely. Add the chopped mint and coriander leaves. Boil for two minutes.
  6. add the beaten yogurt and simmer for another ten minutes. When it oozes out oil again add the fried green chillies and jaggery to the gravy and let it cook for 5 mins so that the juices of the gravy het absorbed by the chilies.
Notes
1. Roast the peanuts in medium flame as it gets roasted quickly.
2. You can also add tamarind juice in this recipe.
3. Any kind of chillies , seeds removed is good.
.
Wordpress Recipe Plugin by EasyRecipe
3.2.1311


This goes well with jeera rice, roti,naan or phulka.

Mirchikasalanfinalname2

Filed Under: SOUTH INDIAN GRAVIES/DAL/CURRY/KUZHAMBU Tagged With: biryani side dish, coconut peanut recipe, green chilli curry, hyderbad recipes, mirchi ka salan recipe, side dish for naan, side dish for rice, side dish for roti, very tasty

Red Thai Tofu Curry

September 19, 2014 by Suki 6 Comments

Thairedcurry


Thairedcurry-12Fried Tofu and bell peppers in a spicy thai curry with high flavors of coconut milk induced in it. Why thai curry suddenly? 😉 Simple! I felt like having it for dinner. I wanted to make something quick for dinner. Curry paste is one of the most convenient items that you keep a tub of it in fridge for days and can be used any time for many thai. You have a lot of store bought curry recipes, its good too. But it is good to prepare your own according to your taste buds. Its healthy and also you can save pretty penny by making it yourself and storing it in fridge. I always wanted to have good thai sauce. I hate to go to restaurants mostly 😉 because sometimes I don’t have vegetarian option when I wanted it most. I felt like having a nice thai curry today, so I attacked google for the recipe. Watched a few youtube channels, and a few of my own attempts I have created this thai curry sauce 🙂 made me happy after seeing the end result. When you have the first spoon after the thai curry is prepared, just try to control yourself or else there wont be much leftover for next person 😀 Store in a tight container for up to 10 days in the fridge or freeze it up for longer.

Thairedcurry-16

Print
RED THAI TOFU CURRY SAUCE
Author: Suganya Hariharan
Recipe type: Main
Cuisine: Asian
Prep time:  5 mins
Cook time:  25 mins
Total time:  30 mins
Serves: 4
 
Ingredients
  • Tofu – 1 Package firm rofu,8 oz, drainage and cut into 1-inch cubes
  • Coconut milk – ½ cup or 1 can
  • Bell peppers – 1 cup (I used yellow and orange)
  • Peanut butter – 2 tbsp
    For Red curry paste:
  • Coriander seeds – 1 tsp
  • Cumin - 1 tsp
  • Pepper balls – 3
  • Red chillies – 3 (soaked in water for ten minutes)
  • Fresh Lemon grass – 1 stalk/ 3 tbsp
  • Green chillies - 1
  • Lime Leaf – 1 tbsp
  • Shallot -1
  • Garlic – 3
  • Ginger – 1 inch
  • Olive oil – 1 tbsp
Instructions
  1. Red curry paste preparation: Blend all the ingredients under “for red curry paste” into smooth paste. This paste takes minutes to make but keep up to taken days if sealed with olive oil in a closed jar. To awaken flavors add some lime juice, add salt and pepper blend into a smooth paste.
  2. Tofu-capsicum preparation: Cut the tofu into slices and press with a paper towel to remove excess moisture. Wait for few minutes and press again. There is a lot of water in there. Heat 1 tbsp oil in a pan, add chilli flakes, place the tofu and capsicum on the pan for five minutes and toss it and fry the other side of the tofu for another five minutes. Season some salt, pepper and soy sauce. Remove the mixture. Keep it aside.
  3. Coconut milk preparation: Pour the coconut milk into a small saucepan over high heat. When it starts to simmer, add the peanut butter, grounded curry paste, lime juice, soy sauce, brown sugar and garlic. Whisk and keep on high heat for 15 minutes or until the sauce has thickened.
    [img src=”https://www.relishthebite.com/wp-content/uploads/2014/09/collage2thairedcurry.jpg” />
  4. Curry Preparation: Add the tofu capsicum and peanuts into this. Simmer for another 5-10 minutes. When the sauce coats the black of a spoon, add small amounts of broth or water and whisk according to the consistency you use.
  5. Serve over rice and noodles. Or any other way 😉 you like it. Sprinkle some sesame seeds and scallions on top of it, nice and generous.
Notes
1. If you want thinner sauce, simmer for less time.
2. Adding crushed peanuts; the constancy really thickens quite a bit.
3. Instead of soy sauce, we can use fish sauce (but not vegetarian). Or can use hoisin sauce also.
4. You can use a store bought curry paste, they are also equally good. But if you want it to be pure vegetarian, check the label, as some curry pastes contain shrimp paste.
5. If you want to know how to toss, push it down, push away and pull back.
Wordpress Recipe Plugin by EasyRecipe
3.2.1311

 Thairedcurry

Filed Under: CHINESE ASIAN INSPIRED, SIDES, VEGAN Tagged With: dinner recipes, red thai curry recipe. thai vegetarian recipes, spicy thai curry recipe, thai curry, thai curry with toffu, that curry with rice

Cauliflower Malligae/ Cauliflower Fry

September 16, 2014 by Suki 2 Comments

Cauliflowermalligae

CauliflowermalligaeCauliflower malligae is a dish famous in Mangalore. The cauliflower is marinated in garlic mint coriander paste and deep-fried. It is a perfect appetizer. The renowned dish in India using cauliflower is gobi 65. It is a fried cauliflower dish where the cauliflower/gobi marinated in chilli powder and deep fried.I will post the recipe of that soon.  So, this cauliflower malligae recipe is something distinct and tasty.

I heard about this recipe on a cookery show, so just tweaked it here and there. It is a very quick, easy recipe. It’s too hard to resist without having them when frying. that’s the biggest problem 😉 when I drop the next set in oil, I keep munching the fried ones 🙂 . You will understand when you fry them. And you can have them as snack or for jeera rice.

The paste that we use here is fresh grinded paste. You can store it for 4-5 days. It can be served as chutneys for dosa,paniyaram. Can even be used to prepare biryani. Can be used for variety rice by just sautéing them and adding it to rice, it taste great.

You can replace this cauliflower with any vegetable for this paste. Try aloo( potato), broccoli, mushroom, babycorn. Everything will be extraordinary. Even simple onion would be great when marinated in this paste and fried.

It is kid friendly as its not spicy. You can spice up the recipe more/less by adding/reducing green chillies.

Print
CAULIFLOWER MALLIGAE / CAULIFLOWER
Author: Suganya Hariharan
Recipe type: Appetizer
Cuisine: Indian
Prep time:  15 mins
Cook time:  25 mins
Total time:  40 mins
Serves: 4
 
Ingredients
  • Cauliflower - 1 medium
  • Rice flour – ½ cup
  • Corn flour – 1 tbsp
  • Salt – as needed[b]To grind:Mint – ½ cup
  • Coriander – ½ cup
  • Green chillies - 6
  • Garlic – 5
  • Ginger – ½ inch
  • Cumin -1/2 tbsp
  • Curry leaves – 5-6
  • Garnish: curry leaves/ onion/ lemon
Instructions
  1. Wash and separate the cauliflower florets from cauliflower. Cut them bite size pieces. You don’t want it to be big chunks, as it’s hard to boil as we are just frying in oil and not boiling. Soak the cauliflower in hot water for 3 minutes to remove any insects.
  2. Grind all the ingredients under “to grind” in a blender to a smooth paste. Add 1 tbsp of water when blending. Don’t add more.
  3. Take a broad vessel; add the cauliflower, rice flour, corn flour, salt and the blended paste. Mix them well. Add water if needed. Set aside for 15 minutes.
  4. Heat oil in a pan, add the cauliflower batch by batch and fry them in a medium flame. You can fry them till they look crispy outside.
  5. Finally add the curry leaves in the oil and fry them.
  6. Garnish with curry leaves,onion and lemon.
Notes
1. You can increase/ decrease green chillies according to your spice level.
2. If you want it crispier, add more rice flour.
3. If you have grounded the paste watery, add more corn flour.
Wordpress Recipe Plugin by EasyRecipe
3.2.1311

Serve hot as a snack or as a side for jeera/ghee rice.

Filed Under: DRY CURRY SIDE DISH/ STIR-FRY, SIDES, VEGAN Tagged With: appetizer, cauliflower fry recipes, cauliflower malligae, Cauliflower recipe, crispy, indian appetizer, indian snack recipes, mangalore recipes

Beetroot Halwa

September 15, 2014 by Suki 7 Comments

Beetroot halwa-name1Beetroot halwa – It is a scrumptious pudding made from grated beetroot simmered in milk, spiced with cardamom and finished with roasted nuts. It is one of the easiest recipes you can make for festivals. Navratri( dusshera) and diwali are nearing by, so I thought it would be a helpful to post it now. And I was celebrating the first month of blogging yesterday through a sweet recipe, beetroot halwa :). yippee! So just made a simple delectable sweet:).

Halwa is a very popular indian dessert. The name originates from an Arabic word “Halwa” which means “sweet”. There are many varieties of halwa like carrot halwa, bettroot halwa and bottle guard halwa. The most popular among them is “carrot halwa”.Beetroot halwa is prepared in the same manner as carrot/gajar halwa. Sweetened condensed milk is optional; I had it in refrigerator after I did the “coconut ladoo”. So, wanted to use it.

Beets are highly nutrious and healthy. It is a great dish for kids. Kids don’t love beetroot a lot, so it  is a good way to sneak it into their diet. Even beetroot tikki/ beetroot paratha are good ideas to make them have this veggie.

3.0 from 1 reviews
Print
BEETROOT HALWA/ BEETROOT SWEET
Author: Suganya Hariharan
Recipe type: Dessert
Cuisine: Indian
Prep time:  10 mins
Cook time:  25 mins
Total time:  35 mins
Serves: 6
 
Ingredients
  • Beetroot – 3 or 2 ½, grated beetroot.
  • Whole Milk – 3 cups
  • Sugar – 5 - 6 tbsp – adjust as required
  • Sweetened condensed milk – 1 tbsp
  • Cardamon – 4 crushed and powdered (I grind it in mortar-pestle with a tsp of sugar)
  • Cashews – 8 broken
  • Badham – 5 sliced/flaked
  • Ghee – 1 ½ - 2 tbsp
Instructions
  1. Rinse, peel and grate the beetroots using hand grater.
  2. Heat a non-stick pan on a low to medium flame and drop the grated beetroots in the pan, sauté them for about ten minutes.
  3. Add the milk and sweetened condensed milk and keep boiling for ten minutes. Keep on stirring at regular intervals so that the mixture does not stick to the pan. The milk will boil and evaporate.
  4. When the milk is reduced to 80%, add the sugar, ghee to the halwa mixture. Stir well and continue to simmer. Keep on stirring them.
  5. Meanwhile, heat a small pan, add a spoon of ghee, and roast the cashews and badham and sauté till golden brown.
  6. Top the beetroot with the roasted nuts. Mix well and switch off when all the milk has evaporated.
Notes
1. You can add grated carrot, it adds extra sweetness and more delicious and healthy.
2. Sweetened condensed milk is optional; I had it in refrigerator after I did the “coconut ladoo”. So, wanted to use it.
3. Switch off only when all the milk has been evaporated.
Wordpress Recipe Plugin by EasyRecipe
3.2.1311

Serve the halwa hot/cold. You can serve it warm with vanilla ice cream.

Beetroot halwa-name1

Filed Under: DESSERTS, SWEETS/DESSERTS Tagged With: Beet recipes, beetroot receipes, beetroot recipes, diwali recipes, festival resipes, healthy dessert healthy sweet, navrathri dessert recipes, sweet recipes

Broccoli Cheese Fritters Eggless with yogurt dip

September 15, 2014 by Suki 12 Comments

BroccoliFritters_Relishthebite-3-2

BroccoliFritters_Relishthebite-3-2Broccoli is a lovely vegetable loaded with full of vitamins, minerals and antioxidants. I love to have them tossed with just salt and pepper. But who does not love fritters? 😉 This recipe is so simple. One of the great way to nosh these broccoli is by tossing them with a bit of flour, garlic, good cheese, spices and sizzle them in oil. You can serve them with sour cream/yogurt dip with chopped scallions and squeeze of lemon. Or just squeeze some lemon, it still delightful. This are perfect for sneaking veggies into an easy appetizer. That cheese provides creaminess to the dish. And always broccoli compliments cheese in a great way. I used to have baked broccoli with just little bit of cheese. They just taste great. I made them eggless for my vegetarian friends 🙂 you can always add egg if you like to. The broccoli is not grated or pureed here, leave it in small recognizable chunks. Shhhh..that’s the trick here! 😉


BroccoliFritters_Relishthebite-7

I added chilly flakes, green chillies, chilli powder and pepper for spice. If you are not fond of spicy dishes, reduce the spice by not adding green chillies and chilli powder.


You can make this dish gluten free by using gluten free all-purpose flour. Kids would love this dish. It can be stored for 2-3 days at least. Reheat it in microwave when you want to have it. They don’t lose their crispiness much.

This dish can be made quickly. Their cooking process is similar to pancakes they cook really fast. You can even bake this dish, but it’s much quicker in a big pan. You can also serve them as a Pattie in a veggie burger topped with a  fried egg. 🙂 Great. right?

My other favorite appetizers:

SPICY SWEET KIWI LAMB WALNUT PUFFS, chickpeas con capsicum puffs, jalapeno cheese muffins

5.0 from 1 reviews
Print
BROCCOLI CHEESE FRITTERS – EGGLESS WITH YOGURT DIP
Author: Suganya Hariharan
Recipe type: Appetizer
Cuisine: American
Prep time:  5 mins
Cook time:  15 mins
Total time:  20 mins
Serves: 10
 
Ingredients
  • Broccoli – 3 cups chopped
  • All-purpose flour – ½ cup
  • Garlic -1 clove, minced
  • Salt – 1 tsp
  • Red pepper flakes / Red chilli – 1 tsp/ 1 broken.
  • Chilli powder – 2 tsp (optional)
  • Bread crumbs – 1 tbsp (optional)
  • Parmesan Cheese -2 tbsp
  • Nacho cheese/ cheddar cheese / blend of cheeses – 2 tbsp
  • Green chillies- 1 chopped finely (optional)
  • Spring onions/scallions – 2 tbsp chopped
  • Pepper powder – 1 tsp
    For Yogurt-Lemon dip:
  • Yogurt – ½ cup
  • Lemon juice – Fresh 1 tbsp
  • Salt – to taste
  • Garlic – 1 clove (minced)
  • Green onion (green part) – ½ tbsp (to garnish)
Instructions
  1. Broccoli Preparation: Chop broccoli. I use even the stems; as the skin is thick, it doesn't cook quickly, slice them into ½-inch lengths. Bring a small saucepan of hot water to boil, add the broccoli, and steam them for 5 minutes. Do not over boil them. And also add water just to cover them, may be ½ inch of water in a small saucepan. After boiling, drain the water and keep it aside to cool.
  2. Batter Preparation: Place the parmesan, flour, garlic, salt, pepper, chilli flakes, green chillies, spring onions, cheese and chilli powder in a medium bowl. Add broccoli and mix them till they are all combined. With a large fork/potato masher, mash the broccoli until soft but recognizable chunks. Stir everything again.
  3. Pan fry: Heat a large nonstick frying pan on medium high with some olive oil. I used my non-stick griller for this recipe. Once the oil is hot, scoop two tablespoons of batter and drop it into the pan, then flatten it with a spatula or spoon. Don’t leave it thick; the inside will then remain uncooked. Cook until golden brown on both sides. It took 2-3 minutes for me per side. Remove and drain on paper towels. Repeat same steps with the additional batter.
  4. Yogurt Lemon Dip: Mix all the ingredients under “for yogurt lemon dip”. Top it with green onions/coriander to garnish.
Notes
1. You can make this dish gluten free by using gluten free all-purpose flour.
2. Add egg if you need. It does give nice bonding. But I wanted it to make it vegetarian friendly.
3. You can also serve them as a Patty in a veggie burger topped with a fried egg.
4. The broccoli is not grated or pureed here, leave it in small recognizable chunks.
5. Make sure to flatten the fritters when you add them in pan, or else it hard to cook inside.
6. You can substitute sour cream for yogurt in the yogurt lemon dip.
7. You can just use one cheese, not necessary to use all cheese.
Wordpress Recipe Plugin by EasyRecipe
3.2.2885

BroccoliFritters_Relishthebite-2-2

Filed Under: BREAKFAST Tagged With: breakfast recipes, broccoli cutlets, Broccoli Fritters, broccoli party recipes, Broccoli recipes, Can make it gluten free broccoli fritters, Cheese recipes, cheesy, Fritter recipes, healthy broccoli recipes, healthy broccoli snacks, healthy recipes, parmesan recipes, Perfect appetizer for fall, quick recipes

Page 1 of 2
1 2 Next »
  1. Pages:
  2. 1
  3. 2
  4. »
  • 1
  • 2
  • Next Page »
  • Facebook
  • Google+
  • Instagram
  • Pinterest
  • Twitter

LOOKING FOR SOMETHING?

logo
Food Advertisements by
logo
Food Advertisements by

Categories

STAY CONNECTED

  • Facebook
  • Google+
  • Instagram
  • Pinterest
  • Twitter

SUBSCRIBE BY EMAIL

SEARCH RELISH THE BITE

logo
Food Advertisements by

Copyright © 2025 · Lifestyle Pro Theme on Genesis Framework · WordPress · Log in