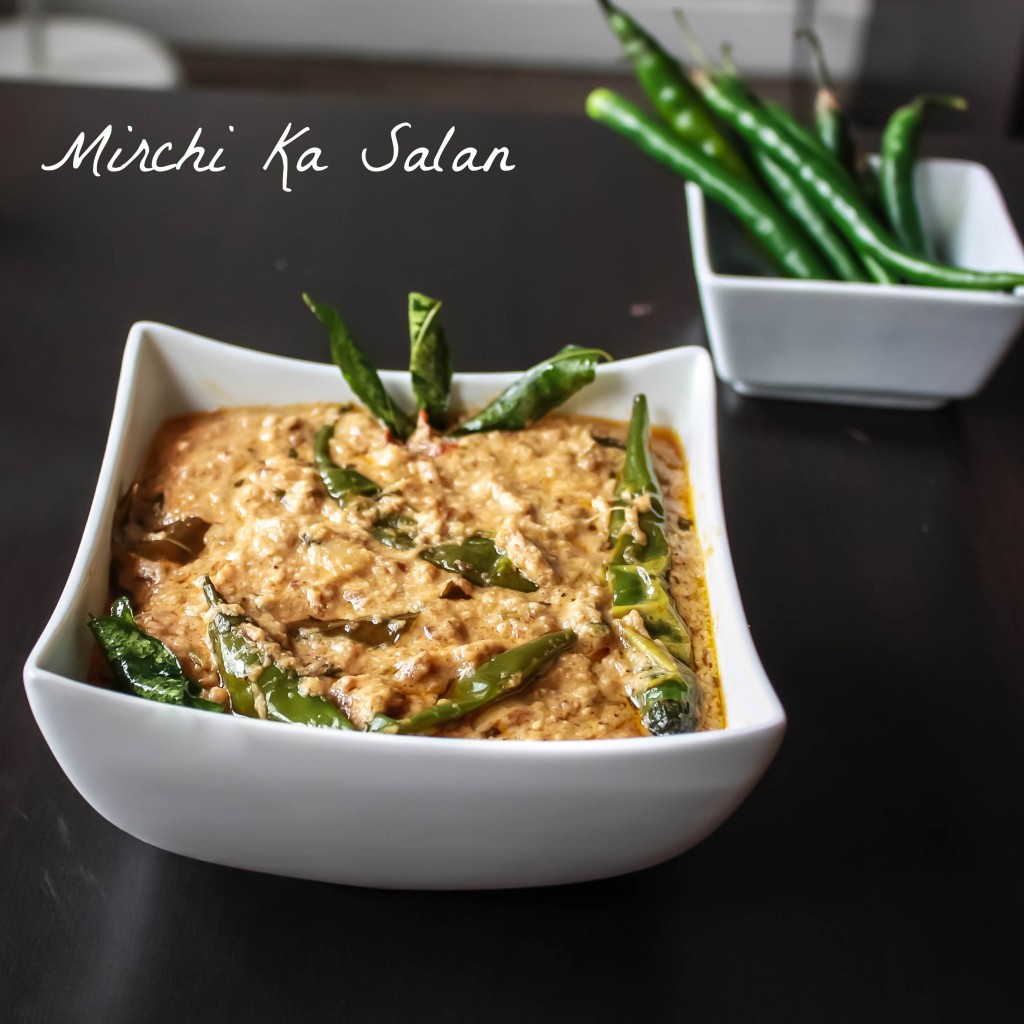
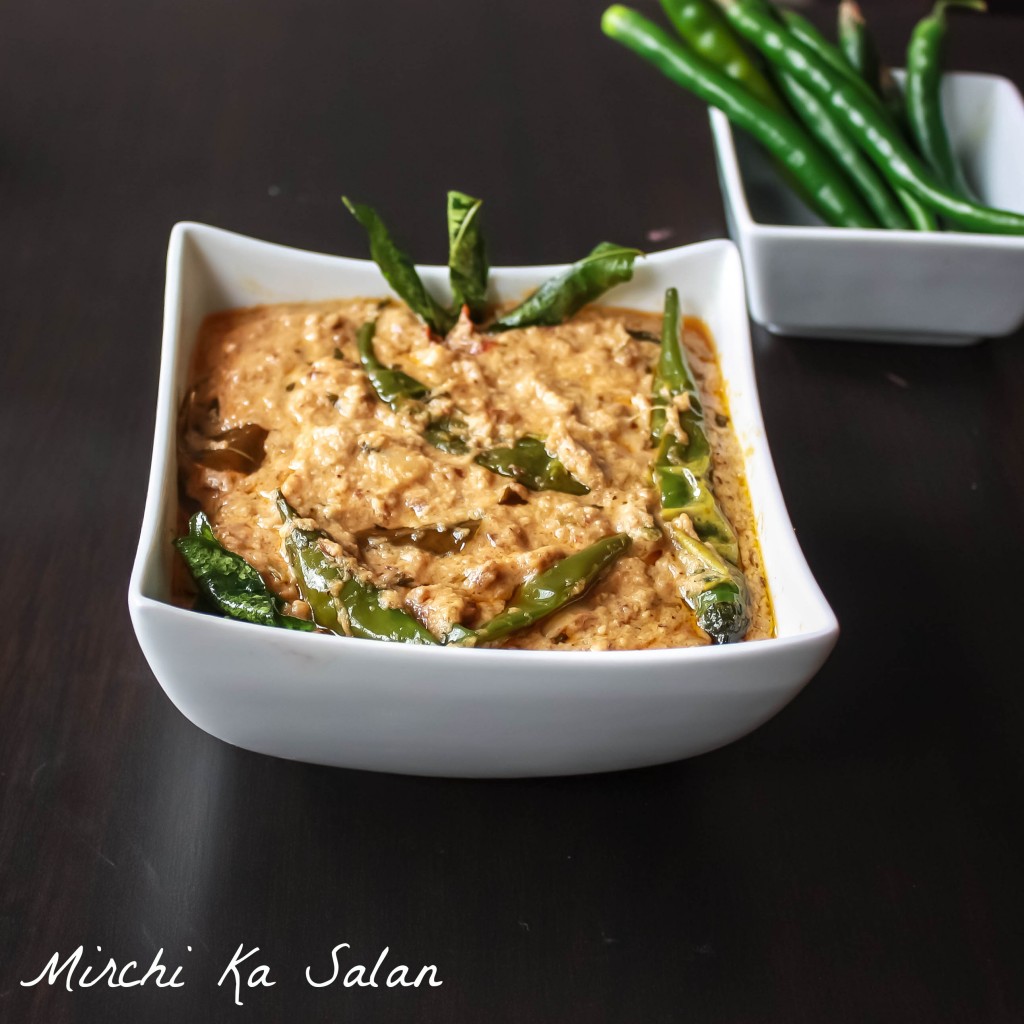
 It’s a popular dish made with fried chillies, peanut, sesame seeds and coconut. The curry goes well with biryani. Mirchi ka salan is similar to bhagara baigan except that you add chillies instead of eggplant and you add yogurt to it. The mirchis used are longer ones; they are called finger hots here. You can even use banana peppers or any kind of green chillies for this preparation. I guess the only curry I know with chilly is the mirchi ka salan. They are made from healthy ingredients – sesame seeds, peanuts, yogurt and coconut. These ingredients help to tone down the heat of the green chillies in the curry.
I came to know about this dish when I stayed in Hyderabad for few months. This dish really stood out to me, I say that because it’s been 6 years but I still remember this dish very much with other beautiful memories. It goes really well with hyderabadi biryani. Its light spiced, creamy and tangy. It looks really simple and normal dish but it is bursting with flavors. Baigan ka salan is also good with biryani. I will post the recipe soon. This goes well with jeera rice, roti,naan or phulka.
This dish involves a lot more of ingredients than an average dish. But its worth doing and tasting it. Making a Mirchi ka Salan is not the quickest thing you can do and it does involve a lot more ingredients than the average dish. But trust me when I say it’s worth it. I have made many a times and it has never failed. The very first time when I heard this dish, I was like” should I go with it”. Back then I was hungry so I just ordered it. But it was VERY TASTY not just because I was hungry ;). It tasted palatable every time I had it.
Vegan note: replace yogurt with coconut milk.
- To roast & grind:
- Peanuts –2 tbsp
- Sesame seeds – 1 tbsp
- Coconut – 1 tbsp
For gravy: - Oil – 1 tbsp
- Red chillies – 2 broken roughly
- Cumin seeds – 1 tsp
- Mustard seeds – 1 tsp
- Fenugreek – 1 tsp
- Curry leaves – 6-8 leaves
- Hing - a pinch
- Onions – 1 large, sliced, 1 cup
- Salt – as needed
- Turmeric – 1 tsp
- Ginger garlic paste – ½ tbsp
- Red chilli powder – 1 tsp
- Coriander powder – 1 tbsp
- Cumin powder – 1 tsp
- Mint – 1 tbsp, chopped finely
- Coriander – 1 tbsp, chopped finely
- Yogurt – ½ cup beaten
- Green Chillies - 8- 10
- Slit the green chillies in the middle and remove the seeds. When they are dry add them to oil and fry till they look little lighter shade.
- Dry roasts the peanuts in a medium flame. When the peanuts are roasted, add the sesame seeds. When the sesame seeds are golden brown, Add coconut. Keep an eye on this. It gets brunt easily. Add this mixture to the blender and blend it with some water to a fine paste.
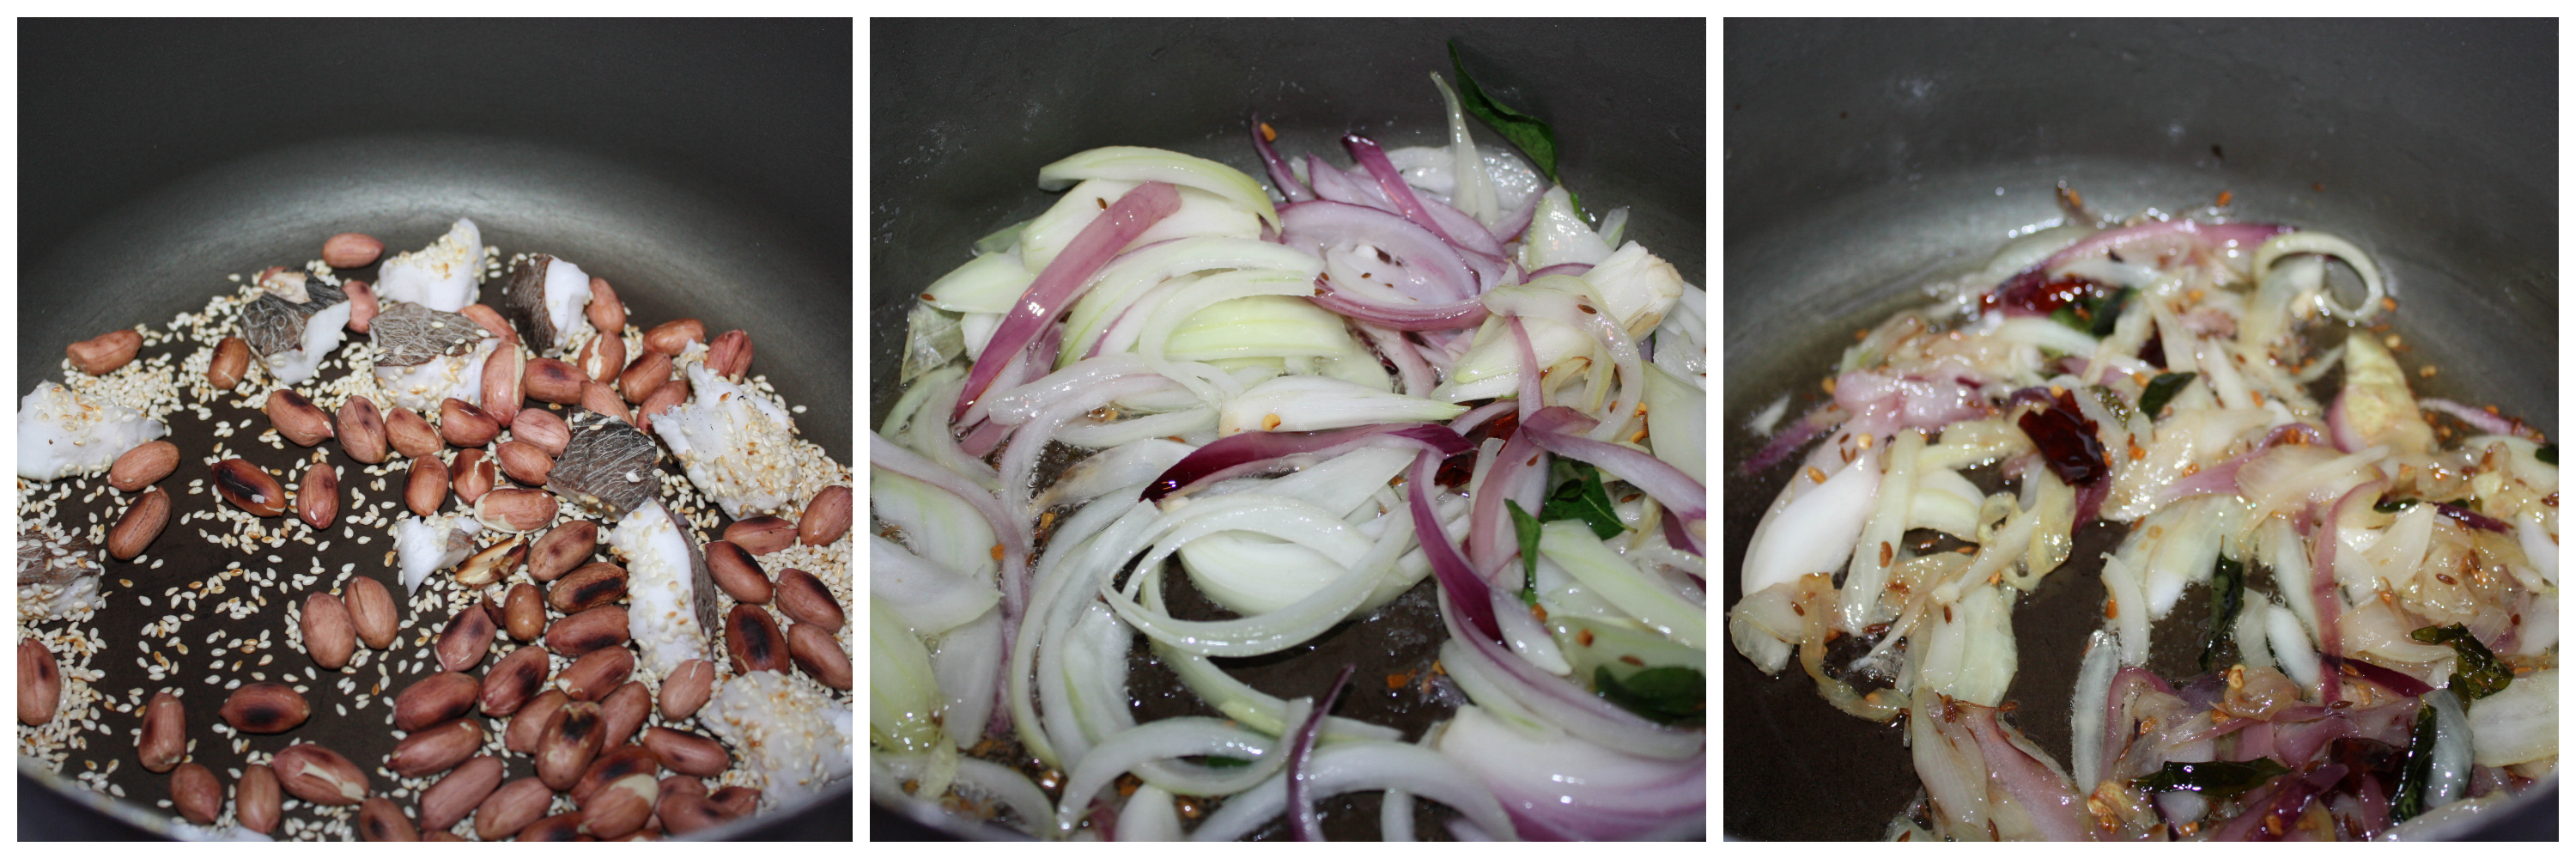
- , Now add the oil in the pan and when the oil is hot, add the whole red chillies, and then add mustard seeds. And when the mustard seeds crackle, add fenugreek seeds and cumin seeds.
- Now add the curry leaves, onions, hing and little salt. Cook the onions till they are golden brown, Add turmeric and ginger garlic paste and cook to remove the raw smell.
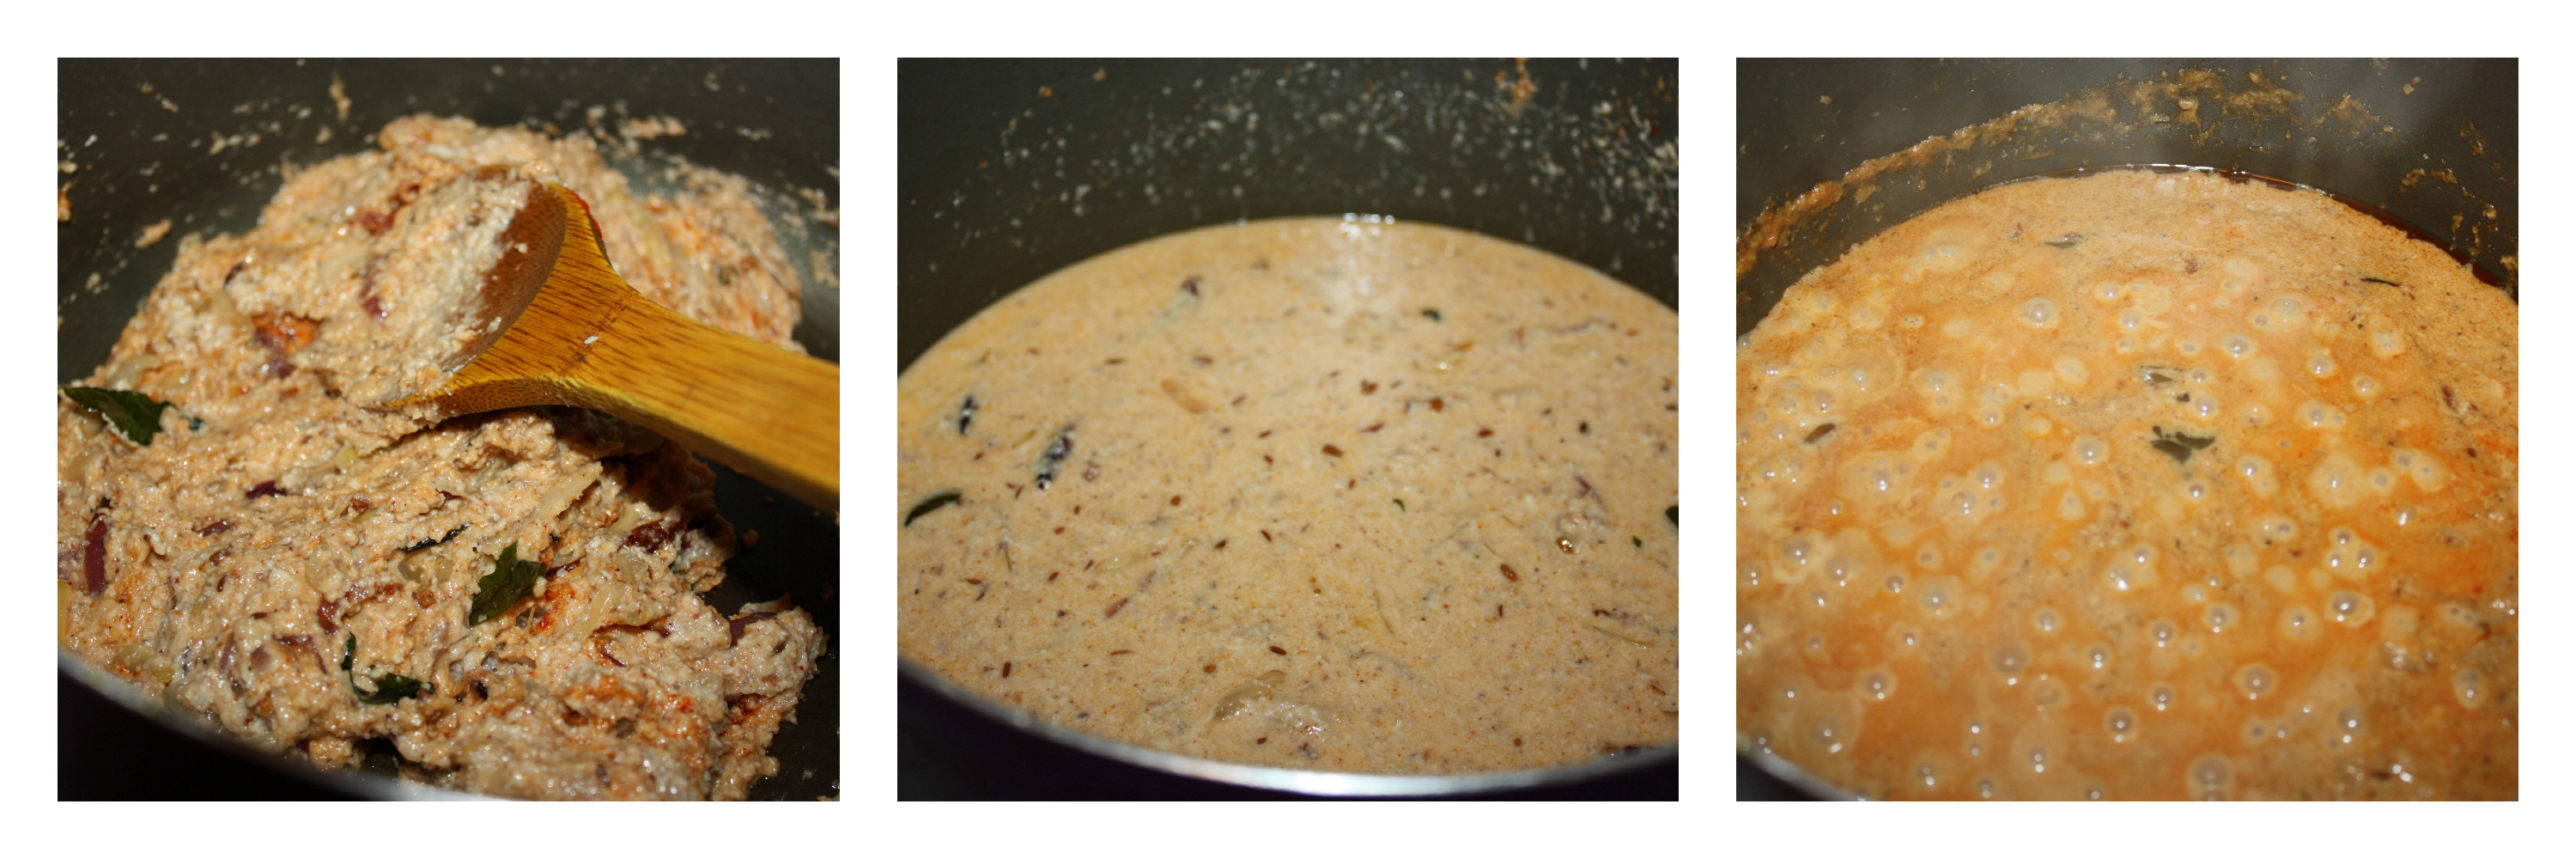
- Add the blended mixture, cumin powder, red chilli powder and coriander powder to the mixture. Fry for two minute and add some water to it. Cook for fifteen minutes. Stir in between till the oil oozes out nicely. Add the chopped mint and coriander leaves. Boil for two minutes.
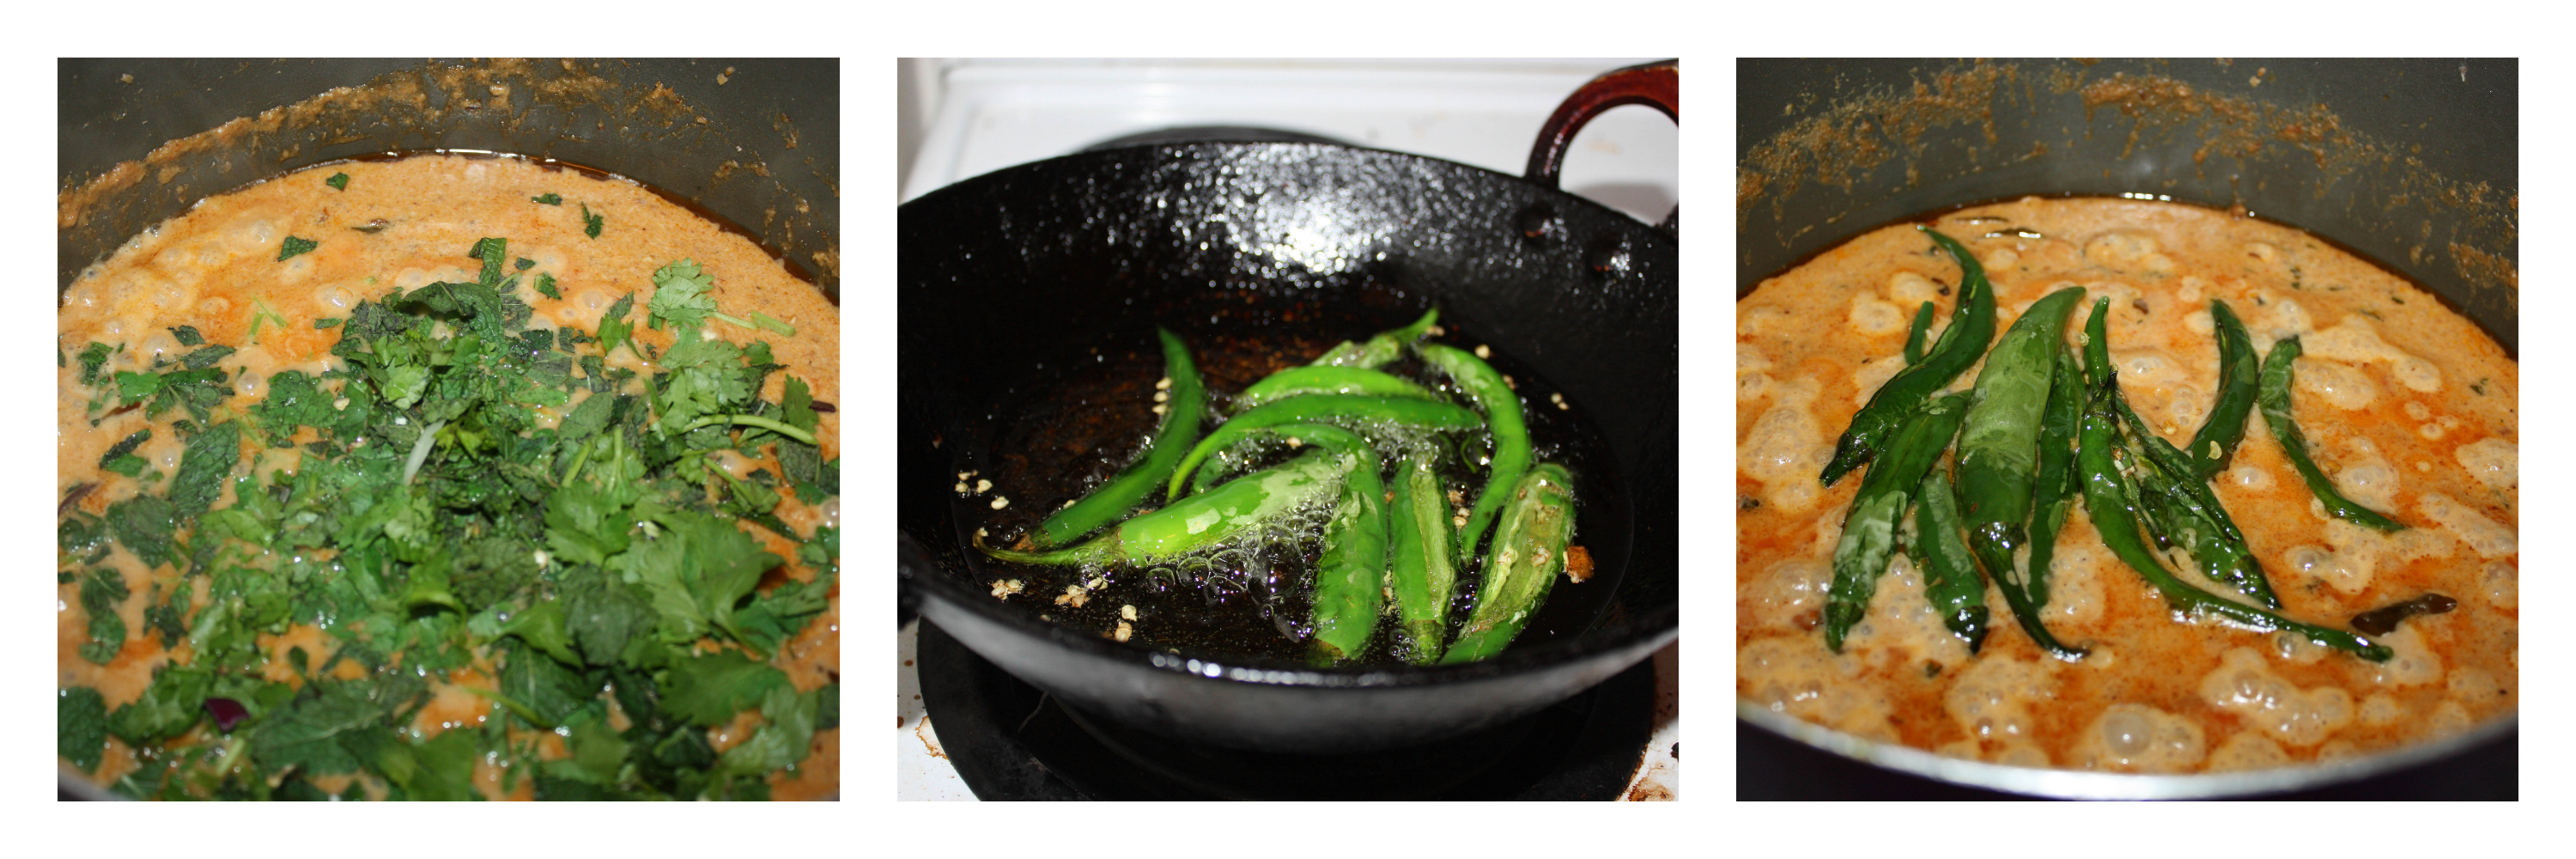
- add the beaten yogurt and simmer for another ten minutes. When it oozes out oil again add the fried green chillies and jaggery to the gravy and let it cook for 5 mins so that the juices of the gravy het absorbed by the chilies.
2. You can also add tamarind juice in this recipe.
3. Any kind of chillies , seeds removed is good.
.
This goes well with jeera rice, roti,naan or phulka.



1st time here, i loved your blog. Great work! Following U via g+
wow it looks so perfectly done. Great recipe, will try sometime soon:)
You click such good pictures, why dont you join us at our Food Photography Series- Saturday Snapshots 🙂 You will find the info on my blog (banner on left upperside). If you are interested, leave your email id and i will get back to you:) I am sure you will have fun:)
Thank you shweta, 🙂 ! Glad you liked it. And regarding food photography series, i read them now, i am not sure if i could follow up each week with a picture of the theme. So, i will follow later..! I am an amateur blogger so it takes a lot of time already :)Thank u but. Appreciated!
I love salan, though I’ve only ever had it outside of home. Your recipe makes me want to try it out in the kitchen. Nicely explained and thanks for the step-wise pics!
Thank you so much 🙂